Article

Control of Porosity and Spatter in Laser Welding of Thick AlMg5 Parts Using High-Speed Imaging and Optical Microscopy

by
Andrei C. Popescu
1,2,*,
Christophe Delval
1 and
Marc Leparoux
1
1
Laboratory of Advanced Materials Processing, EMPA-Swiss Federal Laboratories for Materials Testing and Research, Feuerwerkerstrasse 39, 3602 Thun, Switzerland
2
National Institute for Lasers, Plasma and Radiation Physics, Atomistilor 409, 077125 Magurele, Romania
*
Author to whom correspondence should be addressed.
Metals 2017, 7(11), 452; https://doi.org/10.3390/met7110452
Submission received: 13 September 2017 / Revised: 18 October 2017 / Accepted: 19 October 2017 / Published: 26 October 2017
(This article belongs to the Special Issue Laser Welding)

Abstract

:
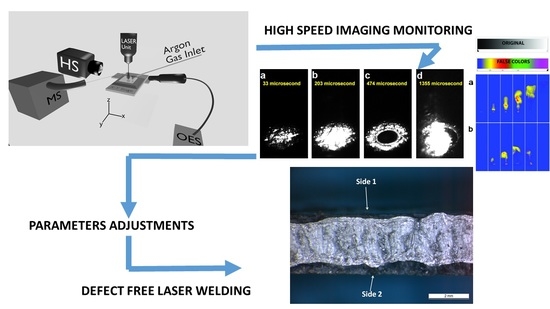
We report on a feedback mechanism for rapid identification of optimal laser parameters during welding of AlMg5 coupons using real-time monitoring by high-speed imaging. The purpose was to constrain the liquid movement in the groove in order to obtain pore-free welds in this otherwise difficult-to-weld alloy. High-speed imaging of the welding process via an optical microscope allowed for recording at millimeter level, providing new information on liquid-metal dynamics during laser irradiation as well as plausible explanations for spatter occurrence and pores formation. The pore formation and especially the position of these pores had to be controlled in order to weld 3 mm thick samples. By tuning both laser power and pulse duration, pores were aligned on a single line, at the bottom of the weld. A laser pass of reduced power on that side was then sufficient for removing all pores and providing a suitable weld.

Graphical Abstract

1. Introduction

Weight and production cost reducing automotive body design are achieved by using laser butt welded semi products such as tailor blanks out of steel and combined materials [1,2]. Laser is preferred for welding, owing to to the high speed of the process, low distortion due to the small heat affected zone, manufacturing flexibility and ease of automation [3,4,5]. Further improvements in transportation can be achieved by replacing steel with lighter metals such as aluminum and its alloys [6,7,8]. However, obtaining reliable, reproducible flawless high-quality welds for these materials is challenging. Aluminum is also difficult to weld because it easily oxidizes. Moreover, due to its high thermal diffusivity, the weld fusion and penetration are more difficult to achieve in comparison to steel [9]. The fast heat exchange implies also a fast solidification that leads to high stresses, resulting in cracks, pores formation or even complete break of the welded area [10,11,12,13,14].
Another general drawback of laser welding, and especially in keyhole mode, consists of the ejection of liquid droplets, known as “spattering”. It often causes defects such as craters, blowouts and underfills that seriously degrade the mechanical properties of the weld [15,16]. Categorization of spatter based on the physical phenomena that contribute to its formation has been proposed by Kaplan and Powell [17]. One cause of spatter formation is the vertical movement of liquid in the groove during irradiation caused by the vapor flow that expands in the keyhole. You et al. [18] attributed this type of spatter formation to the shockwave generated by the expanding vaporized matter from the laser molten pool. In order to understand and avoid this drawback, several research groups monitored in real time the laser welding of metals and alloys by fast imaging [16,17,18,19,20]. Thus, it was possible to extract relevant information about the keyhole (shape, size, liquid movement, pore formation), plume expansion (plume length, expansion speed, particles expulsion) and its effects over the molten pool (liquid spatter). By using a high-speed camera, Zhang et al. [19] visualized the influence of vapor plume on both the melt pool dynamics and transient keyhole cross-section, by applying a sophisticated sample preparation. They observed that for the full penetration of the melt, the recoil pressure of the plume induced a downward flow of the liquid in the keyhole. Because of this movement, the liquid on the keyhole bottom goes upwards with high speed, thus being the main cause for the occurrence of spatter.
High-speed imaging spatter detection contributed to distinguish the welding defects in case of laser welding of stainless steel, by identifying the spatter diameter together with the plume features and ejection direction [18,20]. The presence of spontaneous high amounts of spatter in the image sequences confirmed that a weld seam width reduction occurred. Based on this analogy, the image sequences could be used for evaluating in situ the weld seam quality. For the same material, Li et al. proposed to focus the laser beam in depth for achieving a more stable laser welding by producing a flow towards the bottom of the keyhole, as monitored by in situ X-ray imaging [21].
A method proposed in literature for reducing spatter and porosity during laser welding of dissimilar materials such as Al and Ti alloys is to offset the laser beam towards the Ti side close to the seam. Casalino et al. showed that this offset can produce a highly resistant weld, free of porosity and spatter, with no need for filler or groove preparation [22,23].
The aim of this research was to develop a method based on high-speed imaging and optical microscopy for rapid identification of the optimal parameters for laser welding of a thick sample. We aimed to obtain total heat penetration, to eliminate porosity and splatter and to reduce spatter. For this study, we selected the particular case of an AlMg5 alloy, where porosity is very difficult to be overcome by trial and error adjustments of laser parameters.

2. Materials and Methods

AlMg5 ingots were self-made by cast melting aluminum and magnesium (between 4.5 and 5.5 wt % Mg). Prismatic coupons of 20 × 20 × 3 mm3 were cut from the bulk material. Prior to laser irradiation, the pieces were sandpaper (P 180)-polished and rinsed with ethanol for contaminants and debris removal. The pieces were butt-welded using a pulsed Nd:YAG (λ = 1064 nm) laser source (SLS200-306 Lasag, Belp, Switzerland).
The characterization of laser beam using a MBS300 beam profiler (Ophir, North Logan, UT, USA) revealed a top hat pulse in the image plane of the final laser focusing lens. The spot size for a laser power of 1 kW and 2 ms pulse duration was found to be of 600 μm for a focusing of the beam on surface and of 850 μm for 2.5 mm in depth. The intensity profiles of the spots focused on surface and in depth are presented in Reference [16].
The AlMg5 specimens were pushed against each other on the work bench and held tight using a lock mechanism in order to minimize the gap.
The experimental set-up is schematically presented in Figure 1. The laser beam was perpendicular to the samples surface (Figure 1) and was delivered via optical fiber through an encased optical system mobile on the z axis, consisting of a collimator, guiding mirrors and a lens with 25 cm focal length. The laser beam remained in fixed position, while the samples were moved by an XY translation stage. The normal impinging laser beam has a spot diameter between 600 μm and 1.5 mm, for a 5.5 kW peak power and 1 or 5 ms pulse duration, respectively. For a full penetration butt weld on the 3 mm thick samples, the laser source had to be set to a maximum laser peak power of 5.5 kW with 850 μm spot diameter. The sample surface was kept above or below the beam focus at a distance of 2.5 mm. After establishing the full weld penetration, further process parameters could be tuned in order to improve the weld quality [24]. Pulse duration was varied between 1 and 6 ms. Working with a pulse repetition rate of 10 Hz, the pulse energy was stable for a chosen pulse peak power and all selected pulse durations. The samples were moved perpendicular to the impinging laser beam with stepper motor speeds between 7 and 40 cm/min. No filler material was used for welding the AlMg5 parts.
In order to protect the weld pool against oxidation, high-purity Argon (Ar, 99.9999%) was used as shielding gas. The Ar gas was delivered through a 4 mm diameter polytetrafluoroethylene (PTFE) tubing placed in the xz plane, at 3 cm from the laser spot at an angle of approximately 50° in respect to the sample surface, while the sample was translated along the y direction (see Figure 1 for movement reference). An optimized Ar flow rate of 5 L/min was used for preventing oxidation. Thus, an Ar content of 99% was measured 1 cm ahead of the welding site by mass spectrometry.
Both single laser shot and full welding processes were recorded with a high-speed complementary metal-oxide-semiconductor (CMOS) camera (Motion Pro Y4-S3 mono; Videal AG, Niederoenz, Switzerland) with an image resolution of max. 1024 × 1024 pixels. To record the plume expansion through a 100 mm focal length Zeiss objective, the camera was mounted horizontally, parallel to the sample surface. Frame rates were chosen between 16,400 and 58,001 fps and the shutter speed was set between 100 ns and 20 μs.
For weld pool monitoring through a MZ10 microscope (Leica, Wetzlar, Germany) set to a 2× magnification and tilted to an angle of 45° with respect to the laser beam, the camera frame rate was chosen around 30,000 fps, with the shutter speed set to 100 ns. Molten pool illumination was achieved using cold white light delivered by a KL1500 Electronic halogen lamp source (Schott AG, Mainz, Germany) placed at 3 cm from the irradiation site, at an illumination angle of 45° in respect with the sample. Different color photographic filters were used in order to better distinguish either the features of the plume expansion or the spatter and weld pool. The recordings were processed with Pro Analyst motion analysis software (Version 1.5.9.8, Xcitex, Woburn, MA, USA). Knowing the number of acquired frames per second, the software can establish the occurring time of each frame and using the AlMg5 sample thickness as reference, it can calculate distances and travel speeds for plume expansion and flying particles.
The weld morphology and cross-sections of weld were studied by optical microscopy using an Axioplan microscope (Carl Zeiss, Oberkochen, Germany), equipped with a ProgResC14 plus camera (Jenoptik, Jena, Germany).

3. Results

3.1. Parameters Adjustment Using Optical Microscopy Data

First, it was identified that 5.5 kW laser peak power and over 2 ms pulse duration were mandatory in order to butt-weld 3 mm thick plates. Lower peak powers caused incomplete melting in depth.
Figure 2a–d corresponds to the welds conducted with pulses of 1, 2, 3 and 6 ms duration.
The droplets and particles deposited both around and inside the seam increased in number and dimensions with the pulse duration at constant power. For pulses of 1 ms, most particles had a diameter of 150 μm, increasing up to 1 mm for pulses of 6 ms. For pulse duration of 1 ms, most particles in the vicinity of the seam were polyhedral. By increasing the pulse duration, round particles started to be dominant (for clarity reasons, spherical particles will be thereon called “droplets”). Most of the droplets were surrounded by a halo, most probably part of the initial droplet that spread when it hit the surface. Figure 3 presents in detail a round particle that was still liquid when it collided with the sample surface, producing a splash of liquid metal around it (left side) and some examples of particles with irregular shape (right side).
As the laser peak power had to be maintained at 5.5 kW, the most obvious parameter to vary in order to improve the welds aspect was the laser pulse duration. An easy task in tuning the pulse duration was the study of spatter/splatter on samples surface. Evident signs of violent material expulsion were identified close to the seam in the form of splatter (massive molten metal spill) for 4 and 5 ms pulse durations. Considering these facts, for welding the 3 mm thick AlMg5 samples, a pulse duration of 2 ms was selected for further investigations.
By increasing the translation speed during welding from 7 to 14, 30 and finally 40 cm/min while keeping constant the laser peak power at 5.5 kW, for a pulse duration of 2 ms and a repetition rate of 10 Hz, a decrease of the amount of liquid spilled from the seam and drastically reduced density of droplets on the surface were observed. By doubling the speed from 7 to 14 cm/min, it was observed that the particles’ diameters around the weld decreased from 60–200 μm to 20–100 μm. At 30 and 40 cm/min, no droplets could be found at the samples surface, close to the seam. Only rare droplets exclusively located inside the seam were observed. They exhibited diameters ranging from 200 to 500 μm. Moreover, the cross-sections of samples revealed full penetration welds. Therefore, 30 cm/min scan speed was kept as optimal for our welding conditions.

3.2. Parameters Adjustment Using High-Speed Imaging Data

For identifying the optimal experimental parameters for welding, high-speed imaging of the surface was used for monitoring the liquid phase behavior. This analysis can be of importance for welding from two perspectives: (i) It can provide information about spatter for a particular set of chosen experimental conditions. For welding, spatter can be chosen as one of the control parameters when searching for the optimal welding conditions, as its high amount could mean material loss which causes welding underfill, porosity, as well as a bad visual aspect of the welds; (ii) It allows for real-time visualization of liquid movement in the irradiated area, thus allowing the selection of irradiation parameters so that splatter (large liquid material downpour) can be ruled out.
First, to investigate the interaction between the laser beam and material, single irradiations onto the surface of a sandblasted AlMg5 sample were performed, with the beam focused 2.5 mm in depth. Figure 4 presents a subsequence of representative frames extracted from the real-time recording of an AlMg5 surface state evolution under the action of one laser pulse of 5.5 kW peak power and 2 ms duration.
In the following, for all set of frames, the time reference, “instant = 0 s”, corresponds to the camera internal event trigger (i.e., “Motion Trigger”), defined as an increase from 2% to 5% of the light intensity in the area of irradiation site.
The purpose of this research was to identify the time for incandescence, melting and boiling on metal surface and further compare them with the times recorded for actual welds on the groove between two metal parts. The surface became incandescent 30 μs from the start of laser pulse irradiation (Figure 4a) and reached a maximum of brightness after approximately 200 μs of irradiation (Figure 4b). From this point on, a melting process that started from the center of the spot and expanded in a circular pattern towards the edges of the laser spot was observed. Figure 4c exhibits a representative frame for the liquid phase expansion. The entire irradiated area was completely melted after 800 μs. The molten pool continuously heated by the laser reached the boiling temperature. The first spatter was recorded after 1350 μs.
It has been also observed that the occurrence of events presented in Figure 4 remains the same for pulses with 5.5 kW peak power and longer pulse durations, but the recorded times decreased, while boiling and spatter (Figure 4d) intensified as pulse duration increased.
A basic analytical model that predicts temperature evolution on sample surface during the laser pulse action was used for comparison with the experimental observations [25]. The calculations were conducted on z direction only and surface absorption, conductivity, density, and heat capacity were considered as temperature-independent.
The simplified form of the heat equation becomes:
T t = D 2 T z 2
where T is temperature, t is time, D is the thermal diffusivity, D = k ρ c p , k = thermal conductivity, ρ = density, cp = specific heat.
The solution of the one-dimensional heat equation is:
T ( z ,   t   <   τ ) = 2 α I 0 ( 1 R ) k ( D t ) 1 2 i e r f c [ z 2 ( D t ) 1 2 ]
where τ = pulse duration; α = optical absorption coefficient, I0 = laser peak power, R = reflectivity, k = thermal conductivity; D = thermal diffusivity, ierfc = integral of complementary error function.
For the case of surface temperature (z = 0),
i e r f c [ z 2 ( D t ) 1 2 ] = 1 π
For AlMg5, the constants used in calculations were: k = 140 W/m·K, cp =900 J/kg·K, α = 108 m−1 while the reflectivity for 1064 nm wavelength was selected to be of 93% [26].
The simulated evolution of temperature during the laser pulse is given in Figure 5. At the end of the laser pulse, the surface temperature surpasses 3000 K. For the events recorded in Figure 4, the computed temperatures are T(33 μs) = 683 K, T(203 μs) = 1200 K, T(474 μs) = 1477 K, T(1.355 ms) = 2800 K. While the model accurately predicts what happens at 33 μs since the beginning of laser pulse, it overestimates the temperatures for the ms range. This is certainly due to model simplifications: Surface absorptivity would certainly increase with temperature, laser beam absorption in the plume and radiative losses are not computed. However, the model is useful in predicting the intervals where boiling can occur. AlMg5 boiling temperature is at ~2700 K [27], occurring after 1.355 ms since the start of the laser pulse, as caught on high-speed camera footage. The model obtained a value of 2800 K at 1.355 ms. With small adjustments, recordings can be optimized in order to capture the footage of interest only, thus reducing considerably the videos processing time and video storage space.
In a second step, a butt weld between two adjacent parts was performed and observed with the high-speed camera. Figure 6a shows that the metal heated by the laser spot first became incandescent. The joint borders progressively took a circular shape under the action of laser pulse (Figure 6b). Melting occurred after approximately 200 μs starting from the spot center that remained consistent with the previous observations obtained on flat surface irradiations. The liquid rose from the groove and produced liquid expulsion that began after approximately 830 μs (Figure 6c). At the end of the laser pulse, the liquid fell back into the groove forming a whirlpool (Figure 6d). We believe that the liquid follows the crater walls shaped conically when returning into the groove, thus producing this whirlpool. During this upwards/downwards movement, the liquid loses heat and becomes denser than the liquid remaining on the bottom of the groove. The pressure put by the returning liquid upon the bottom pool can cause a spill between at the joint between the two pieces to be welded (see area marked with a red circle in Figure 7a).
In case of butt welding, spatter occurs even before surface boiling. We believe this to be the cause of gas bubbles that emerge from the bottom of the molten pool causing liquid spatter. To confirm this assumption, the joint between two AlMg5 coupons was irradiated with single laser pulses (power = 5.5 kW, frequency = 1 Hz, in-depth focusing at 2.5 mm), and subsequently, a cross-section of the weld was studied by optical microscopy (Figure 7). Indeed, we found pores that seemed to be trapped during solidification, close to the bottom of the weld. The increase of pulse duration generated larger pores in the solidified keyhole. In the case of a 2 ms pulse, ~50 μm pore was formed (Figure 7a), while increasing the pulse duration to 3 ms resulted in a pore with a diameter of ~300 μm (Figure 7b). This pore diameter ascending trend continued up to a pulse duration of 6 ms, when most of the keyhole was devoid of metal (Figure 7c).

3.3. Obtaining Pore-Free Welds in AlMg5 Alloy Using an Infrared Millisecond Laser Source

The molten pool manifested very little boiling and spatter for a 3 kW regime. However, cross-sections revealed that the weld was not complete, 3 kW peak power proving to be insufficient to melt 3 mm thick AlMg5 samples. The weld also displayed root porosity (Figure 8a). A peak power of 5.5 kW was necessary to weld 3 mm thick samples, but in this case, numerous large pores randomly distributed in the weld were observed in cross-section.
Weld experiments were also conducted with laser beams focused in depth from 0 to 5 mm, with a step of 0.5 mm between samples. Beam focusing on surface was ruled out, as it induced too much spatter and material loss, visible both in the high-speed images and also visually, in the weld aspect. Spatter reduced progressively with beam defocusing in depth and pores were more confined towards the bottom of the weld as the defocusing increased. The optimal defocus distance was found to be 2.5 mm in depth, corresponding to a circular spot of 850 μm diameter. In this irradiation regime total heat penetration was achieved and pores were isolated at the bottom of the weld, close to the bottom edge of coupon (Figure 8b). By increasing the laser power even more, the spatter and pores will increase, while continuing defocusing to 4 or 5 mm in depth would reduce the molten pool depth. It was clear that a pore-free single-step welding with our laser source on this alloy was not possible under the investigated parameters. A second welding step on the other side, where the pores were confined, was necessary. A 3 kW pulse peak power focused 2.5 mm in depth, at the same scan speed and pulse repetition rate as in the previous case, it was sufficient enough to remove the pores and obtain a pore-free weld (Figure 8c).

4. Discussion and Conclusions

The laser welding process of AlMg5 parts with a millisecond Nd:YAG laser source emitting in infrared was monitored by high-speed imaging and correlated with optical microscopy analyses for a faster selection of optimal parameters in view of obtaining a pore-free and splatter-free weld.
High-speed imaging via a microscope objective of an actual laser welding process was conducted and we found that in the case of beams focused in depth, liquid metal is pushed upwards by the vaporized metal expanding from the bottom of the molten pool. It caused spill and spatter and was partially impeded to refill the groove by the gas metal cloud emerging from the bottom of the groove.
While providing useful information, it must be stated that this high-speed imaging investigation in static regime can differ from the actual welding process in dynamic regime. Indeed, in a static regime, a laser beam at normal incidence on a relatively smooth surface is partly reflected in a specular manner, while a small part of it is absorbed by the medium. In a dynamic high-power regime, a keyhole containing mostly metal vapour is formed. The laser beam can penetrate deeper into the material by means of this cavity and it is reflected multiple times on the keyhole walls, a part of it being absorbed at each contact with the walls. Thus, the multiple Fresnel absorption/reflection can significantly increase absorption efficiency for the laser radiation in a dynamic regime, and therefore the involved temperatures could be more elevated while event times could be shorter as compared to the static regime [28,29].
Compared to the laser irradiation of coupons surface, spatter is formed earlier in the case of irradiation of the joint between two coupons. One potential explanation for the spatter occurring at different times (830 μs vs. 1350 μs, respectively) might be that the mechanism of spatter formation differs: in the case of surface irradiation, metal has to reach first the melting temperature and then the boiling temperature for spatter to occur, while for the joint irradiation case, molten metal pouring from the edges in contact, is lifted upwards by the gases rising from the groove.
Optical microscopy images of cross-sections after single-pulse irradiations (Figure 7) showed that the pores could originate from the bottom of the molten pool and their size is increasing as the laser pulse power increases. The metallic mirror-like shine of the pores together with their spherical shape point towards the hypothesis that they are a result of hot metallic vapors that rose from the bottom of the molten pool in a liquid environment that later solidified and trapped them. The vapors condensed on the solidified spherical walls during cooling, providing the mirror-like aspect.
The sample thickness which required maximum laser power together with the information on liquid dynamics provided by high-speed imaging and optical microscopy reduced the options of parameters to be varied to a minimum, making the optimization process quite fast. As high power was needed for welding the 3 mm thick samples, the pores presence could not be ruled out. A solution was to contain them at the bottom of the weld by tuning the beam focusing. As laser power decreased by defocusing, the temperature of the molten metal decreased, meaning that it solidified faster after the pulse ending. An experiment involving high-speed camera for monitoring the molten pool together with optical microscopy of the cross-sections revealed that 2.5 mm defocusing in depth of the beam was the optimal regime for containing the pores close to the bottom of the weld, immediately after their genesis. In order to ensure a pore-free weld, the sample side with the aligned pores had to be melted in order for the gases to be released and the liquid metal to rearrange. After a few tests, the optimal pulse power that ensured a pore-free weld was found to be of 3 kW.
High-speed imaging monitoring supported by optical microscopy cross-section investigations should allow users to adjust laser parameters for any type of high-power processing laser source in order to be able to weld even the most problematic metals and alloys.

Acknowledgments

The authors acknowledge the support of this research by SCIEX-NMS.CH (Scientific Exchange Programme—New Member States of the European Union–Switzerland) under the contract 12.346 PLASDIAMET (Diagnostic method for liquid droplets in ablation plasma generated during high resolution laser processing of materials). Andrei C. Popescu acknowledges the CNCS/CCCDI–UEFISCDI for financial support during writing of this manuscript under the Project PN-III-P2-2.1-PED-2016-1309.

Author Contributions

Andrei C. Popescu designed and performed the experiments, conducted optical and electron microscopy analysis and wrote the manuscript. Christophe Delval performed the high speed imaging monitoring and extracted necessary data from the recordings using the ProAnalyst software. Marc Leparoux provided the analysis tools for this research, synthesized the AlMg5 samples, supervised the experiments, corrected and structured the manuscript in the final form.

Conflicts of Interest

The authors declare no conflict of interest.

References

  1. Arcelor Mittal. Available online: http://automotive.arcelormittal.com/tailoredblanks (accessed on 31 August 2017).
  2. Wisco Tailored Blanks. Available online: http://www.tailored-blanks.com/en/about.php (accessed on 31 August 2017).
  3. Lu, J.; Kujanpää, V. Review study on remote laser welding with fiber lasers. J. Laser Appl. 2013, 25, 052008. [Google Scholar] [CrossRef]
  4. Kose, C.; Karaca, E. Robotic Nd:YAG fiber laser welding of Ti-6Al-4V Alloy. Metals 2017, 7, 221. [Google Scholar] [CrossRef]
  5. Wu, Q.; Gong, J.K.; Chen, G.Y.; Xu, L. Research on laser welding of vehicle body. Opt. Laser Technol. 2008, 40, 420–426. [Google Scholar] [CrossRef]
  6. Lanza, M.; Lauro, A.; Scanavino, S. Fabrication and weldability in structures. AL Alumin. Alloys 2001, 13, 80–86. [Google Scholar]
  7. Gao, X.; Zhang, L.; Liu, J.; Zhang, J. A comparative study of pulsed Nd:YAG laser welding and TIG welding of thin Ti6Al4V titanium alloy plate. Mater. Sci. Eng. A 2013, 599, 14–21. [Google Scholar] [CrossRef]
  8. Leo, P.; D’Ostuni, S.; Casalino, G. Hybrid welding of AA5754 annealed alloy: Role of post weld heat treatment on microstructure and mechanical properties. Mater. Des. 2016, 90, 777–786. [Google Scholar] [CrossRef]
  9. Good Fellow. Available online: http://www.goodfellow.com/E/Aluminum.html;http://www.goodfellow.com/E/Stainless-teel-AISI-304.html (accessed on 31 August 2017).
  10. Jeffus, L.F. Welding: Principles and Applications, 6th ed.; Cengage Learning: New York, NY, USA, 2007. [Google Scholar]
  11. Harvey, J.P.; Chartrand, P. Modeling the hydrogen solubility in liquid aluminum alloys. Metall. Mater. Trans. B 2010, 41, 908–924. [Google Scholar] [CrossRef]
  12. Ola, O.; Doern, F. Keyhole-induced porosity in laser-arc hybrid welded aluminum. Int. J. Adv. Manuf. Technol. 2015, 80, 3–10. [Google Scholar] [CrossRef]
  13. Scintilla, L.D. Continuous-wave fiber laser cutting of aluminum thin sheets: Effect of process parameters and optimization. Opt. Eng. 2014, 53, 66–113. [Google Scholar] [CrossRef]
  14. Leo, P.; Renna, G.; Casalino, G.; Olabi, A.G. Effect of power distribution on the weld quality during hybrid laser welding of an Al-Mg alloy. Opt. Laser Technol. 2015, 73, 118–126. [Google Scholar] [CrossRef]
  15. Karlsson, J.; Kaplan, A.F.H. Analysis of a fibre laser welding case study, utilising a matrix flow chart. Appl. Surf. Sci. 2011, 257, 4113–4122. [Google Scholar] [CrossRef]
  16. Popescu, A.C.; Delval, C.; Shadman, S.; Leparoux, M. Investigation and in situ removal of spatter generated during laser ablation of aluminium composites. Appl. Surf. Sci. 2016, 378, 102–113. [Google Scholar] [CrossRef]
  17. Kaplan, A.F.H.; Powell, J. Spatter in laser welding. J. Laser Appl. 2011, 23, 032005. [Google Scholar] [CrossRef]
  18. You, D.; Gao, X.; Katayama, S. Monitoring of high-power laser welding using high-speed photographing and image processing. Mech. Syst. Signal Process. 2013, 20, 39–52. [Google Scholar] [CrossRef]
  19. Zhang, Y.; Chen, G.; Wei, H.; Zhang, J. A novel “sandwich” method for observation of the keyhole in deep penetration laser welding. Opt. Lasers Eng. 2008, 46, 133–139. [Google Scholar] [CrossRef]
  20. You, D.; Gao, X.; Katayama, S. Visual-based spatter detection during high-power disk laser welding. Opt. Laser Eng. 2014, 54, 1–7. [Google Scholar] [CrossRef]
  21. Li, S.; Chen, G.; Katayama, S.; Zhang, Y. Relationship between spatter formation and dynamic molten pool during high-power deep-penetration laser welding. Appl. Surf. Sci. 2014, 303, 481–488. [Google Scholar] [CrossRef]
  22. Casalino, G.; Mortello, M.; Peyre, P. Yb-YAG laser offset welding of AA5754 and T40 butt joint. J. Mater. Process. Technol. 2015, 223, 139–149. [Google Scholar] [CrossRef]
  23. Casalino, G.; Mortello, M. Modeling and experimental analysis of fiber laser offset welding of Al-Ti butt joints. Int. J. Adv. Manuf. Technol. 2016, 83, 89–98. [Google Scholar] [CrossRef]
  24. Xue, X.; Amorim, B.P.J.; Liao, J. Effects of pulsed Nd:YAG laser welding parameters on penetration and microstructure characterization of a DP1000 steel butt joint. Metals 2017, 7, 292. [Google Scholar] [CrossRef]
  25. Sands, D. Pulsed laser heating and melting. In Heat Transfer—Engineering Applications; Vikhrenko, S.V., Ed.; InTech: Rijeka, Croatia, 2011; pp. 47–70. [Google Scholar]
  26. Gill, D.H.; Newnam, B.E. Picosecond-pulse damage studies of diffraction gratings. In Damage in Laser Materials; Bennet, H.E., Guenther, A.H., Milam, D., Newnam, B.E., Eds.; National Bureau of Standards Special Publication: Gaithersburg, MD, USA, 1986; Volume 727, pp. 154–161. [Google Scholar]
  27. Haynes, W.M. CRC Handbook of Chemistry and Physics, 97th ed.; CRC Press: New York, NY, USA, 2017. [Google Scholar]
  28. Svenungsson, J.; Choqueta, I.; Kaplan, A.F.H. Laser welding process—A review of keyhole welding modeling. Phys. Procedia 2015, 78, 182–191. [Google Scholar] [CrossRef]
  29. Jin, X.; Cheng, Y.; Zeng, L.; Zou, Y.; Zhang, H. Multiple reflections and Fresnel absorption of Gaussian laser beam in an actual 3D keyhole during deep-penetration laser welding. Int. J. Opt. 2012, 361818, 1–8. [Google Scholar] [CrossRef]
Figure 1. Schematic of experimental set-up for laser welding and monitoring. HS: High-speed camera.
Metals 07 00452 g001
Figure 2. Optical microscopy images of seams in case of laser welding of AlMg5 parts under Ar. Laser peak power of 5.5 kW and pulse duration of (a) 1 ms; (b) 2 ms; (c) 3 ms; and (d) 6 ms, respectively. Red circles are marking droplets present around the seam.
Metals 07 00452 g002aMetals 07 00452 g002b
Figure 3. Optical microscopy images of particles found in the vicinity of the weld: left side-round droplet that was probably still liquid when it hit the surface. The impact produced a splash of molten metal around it; right side-particles of irregular shape.
Metals 07 00452 g003
Figure 4. High-speed imaging of AlMg5 surface behavior under the action of a laser pulse of 5.5 kW power and 2 ms duration: (a) start of incandescence; (b) highest incandescence before melting; (c) expansion of the liquid phase starting from the center of the spot; (d) liquid expulsion from the molten pool.
Metals 07 00452 g004
Figure 5. Simulation of AlMg5 surface temperature evolution during irradiation with a laser pulse of 5.5 kW peak power and 2 ms duration.
Metals 07 00452 g005
Figure 6. High-speed imaging of phenomena occurring during laser irradiation with a pulse of 5.5 kW power and 2 ms duration of the joint between two AlMg5 pieces: (a) metal reaches incandescence; (b) molten metal rises from the groove; (c) expulsion of liquid phase; (d) metal returns in the groove forming a whirlpool.
Metals 07 00452 g006
Figure 7. Optical microscopy images of cross-sections of laser welds conducted with discrete pulses, power = 5.5 kW, frequency = 1 Hz, in-depth focusing of 2.5 mm: (a) weld with reduced porosity and spilled material; (b) weld with large pore; and (c) keyhole devoid of metal.
Metals 07 00452 g007aMetals 07 00452 g007b
Figure 8. Optical microscopy image of welded joints in case of casted AlMg5 parts: (a) Ar, peak power = 3 kW, frequency = 10 Hz, pulse duration = 2 ms, 1 pass; (b) Ar, peak power = 5.5 kW, frequency = 10 Hz, pulse duration = 2 ms, 1 pass; (c) Side 1: Ar, peak power = 5.5 kW, frequency = 10 Hz, pulse duration = 2 ms, 1 pass; Side 2: Ar, peak power = 3 kW, frequency = 10 Hz, pulse duration = 2 ms, 1 pass.
Metals 07 00452 g008aMetals 07 00452 g008b