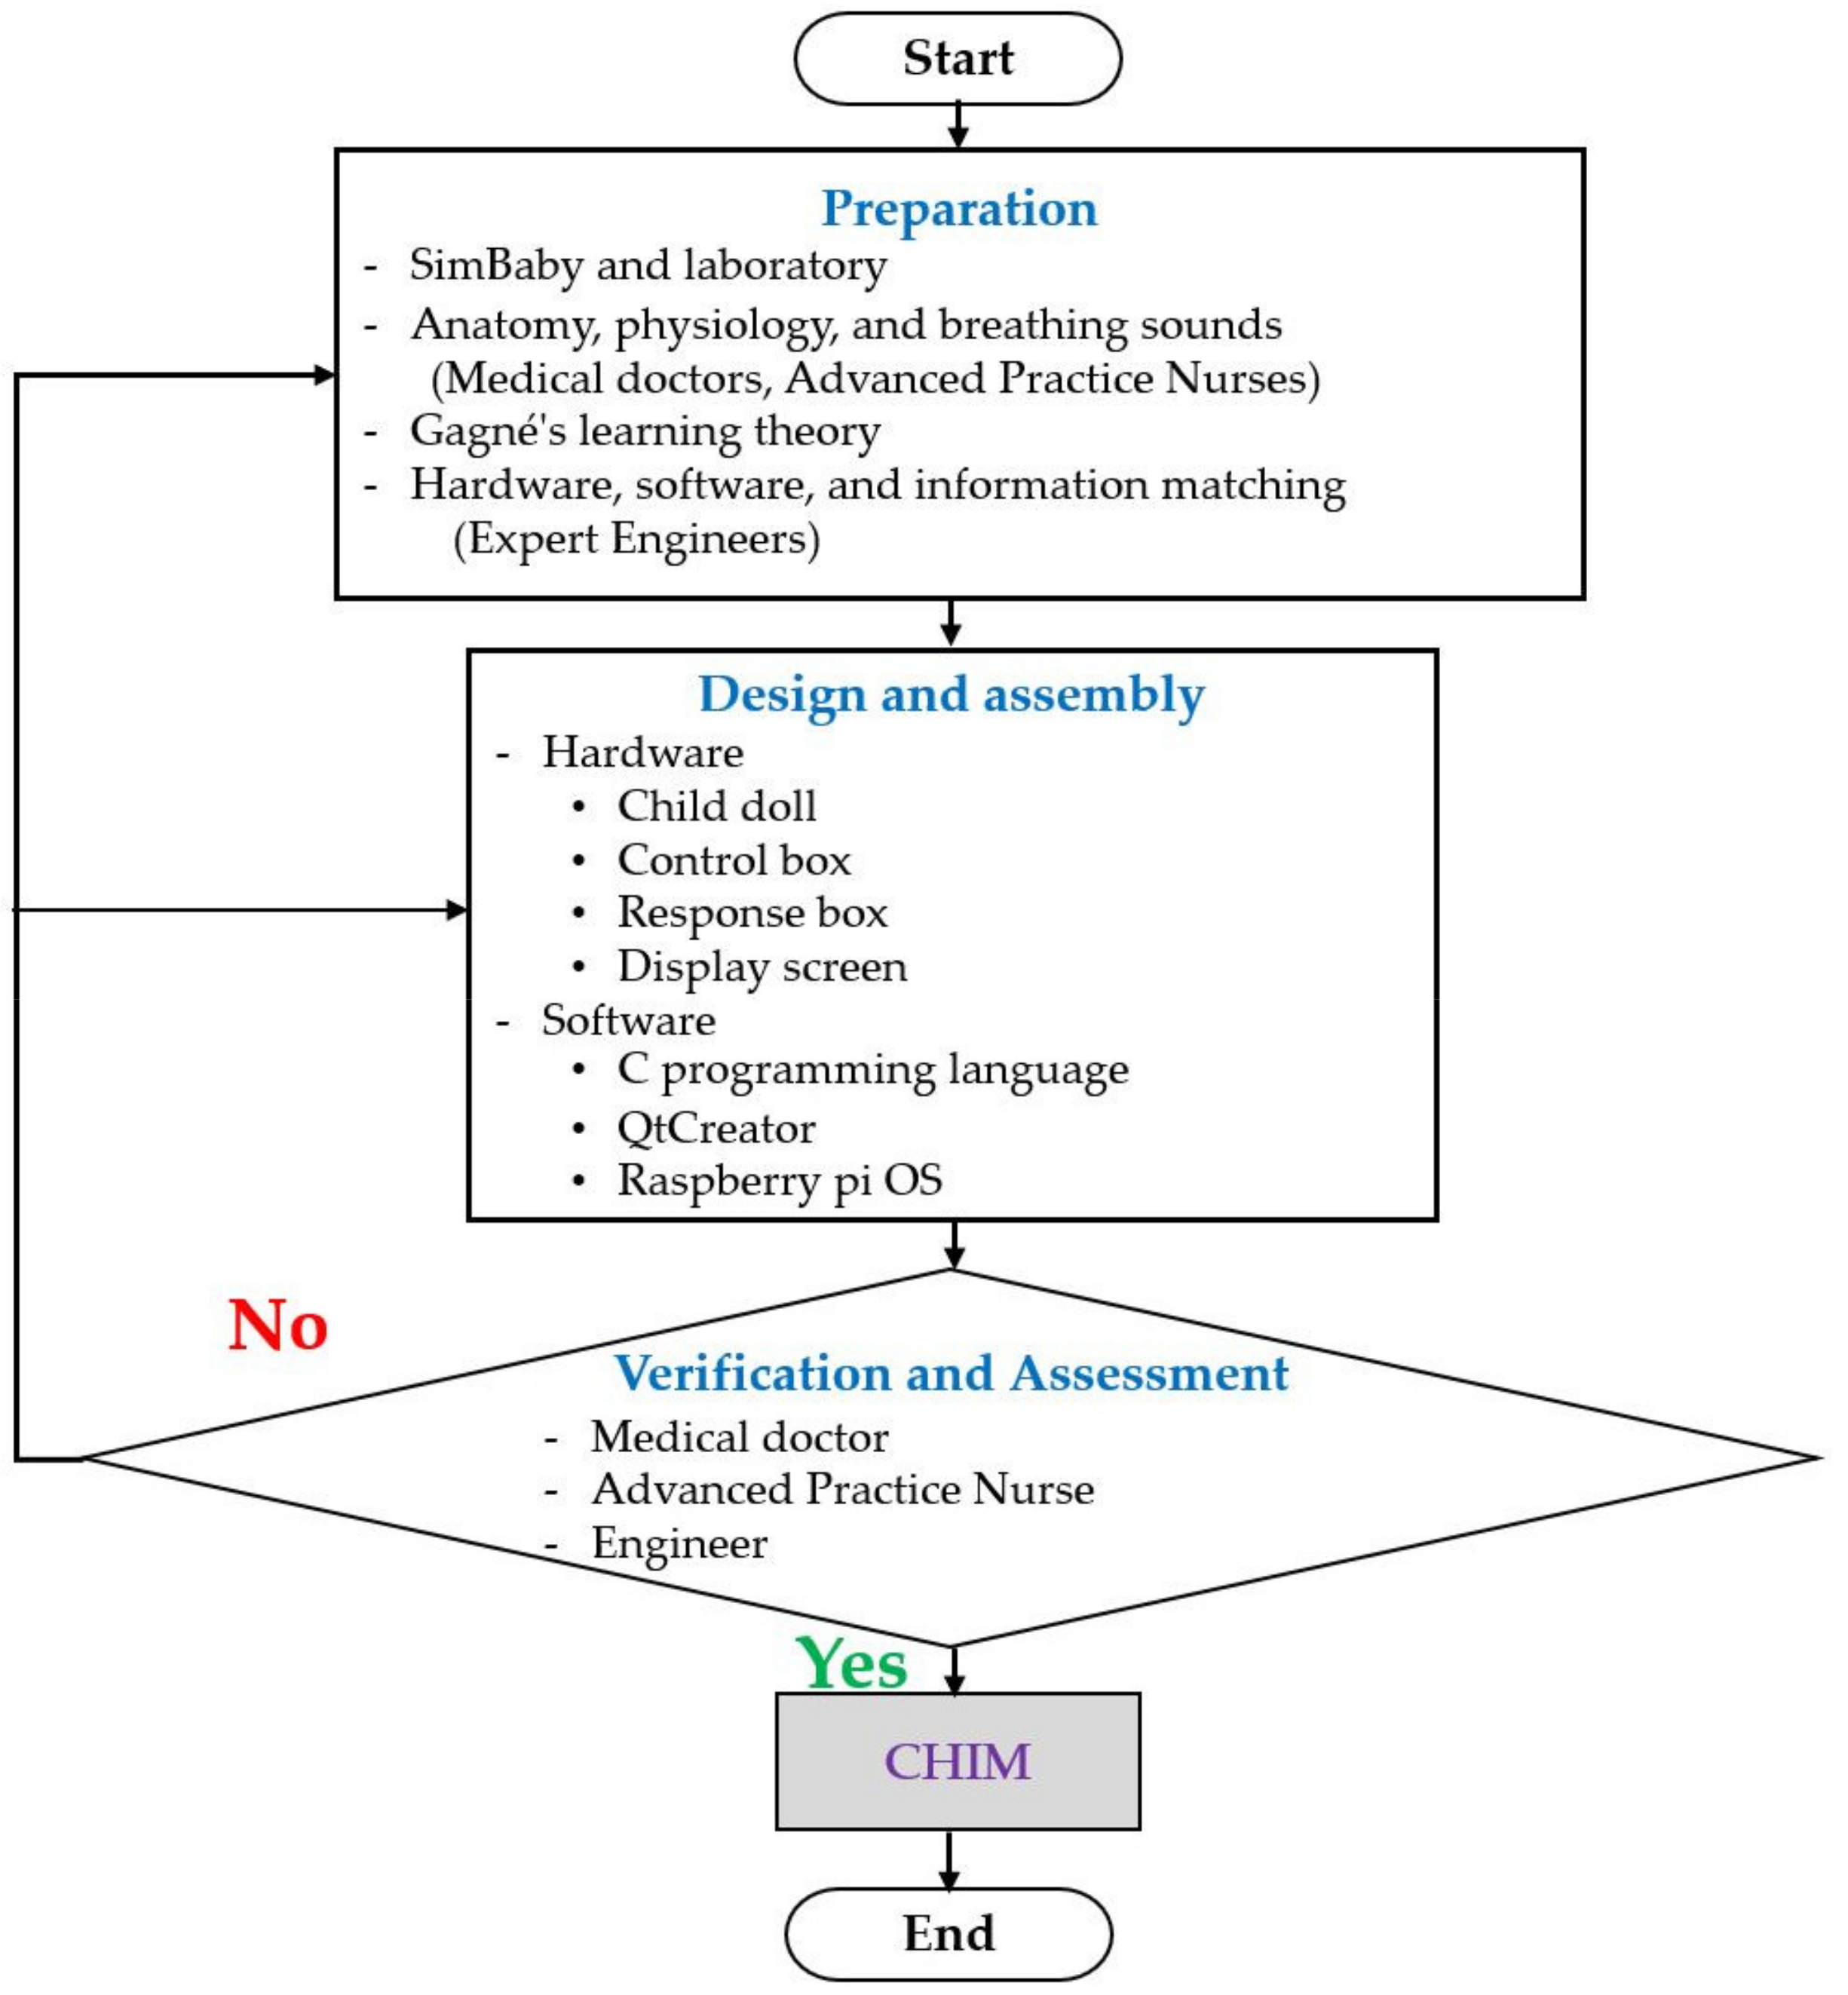
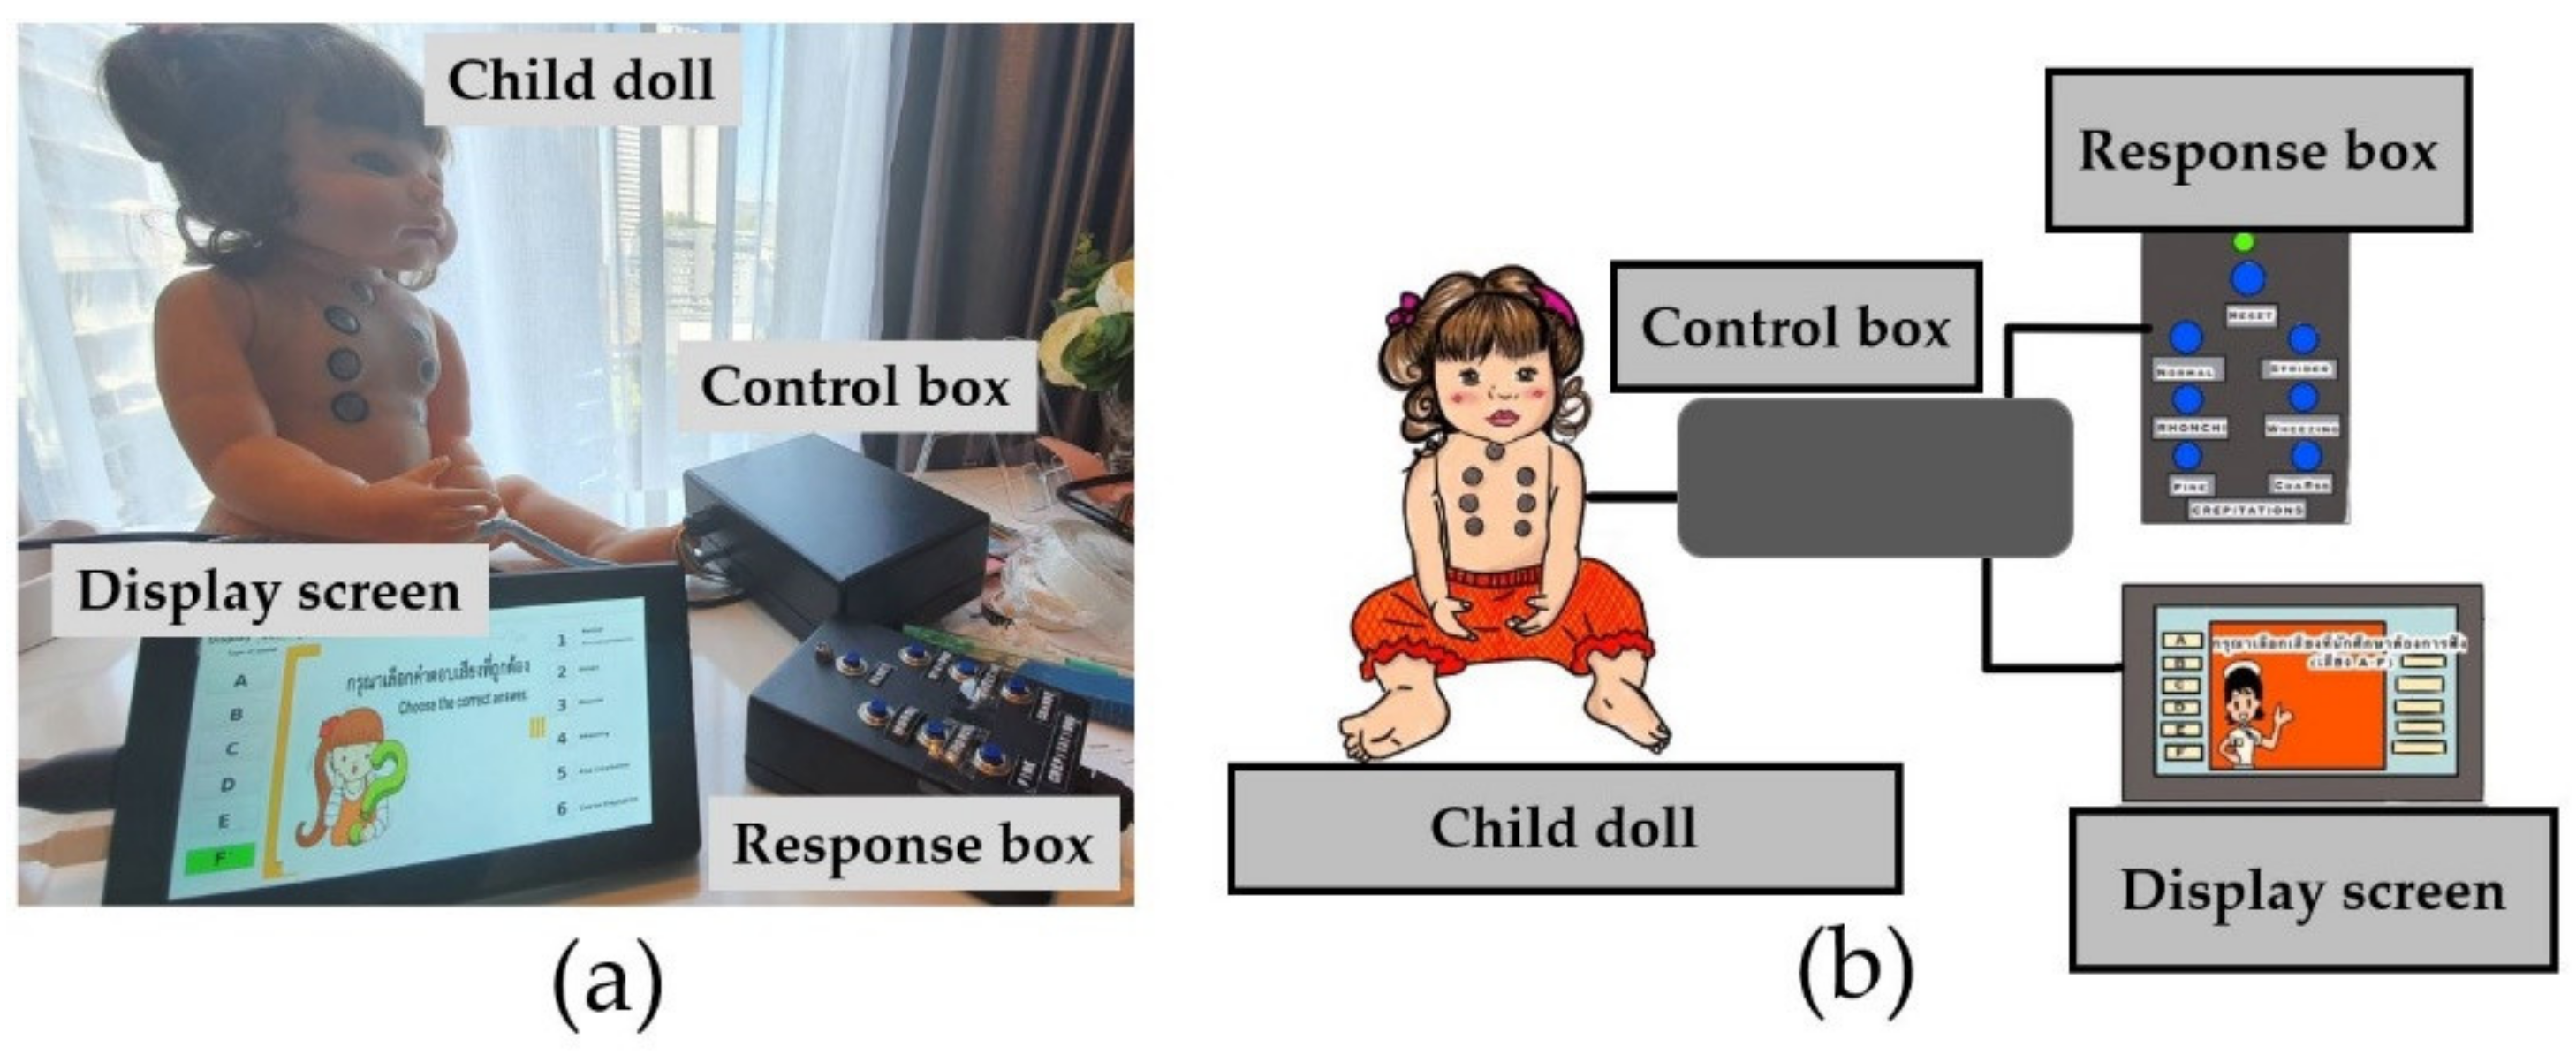
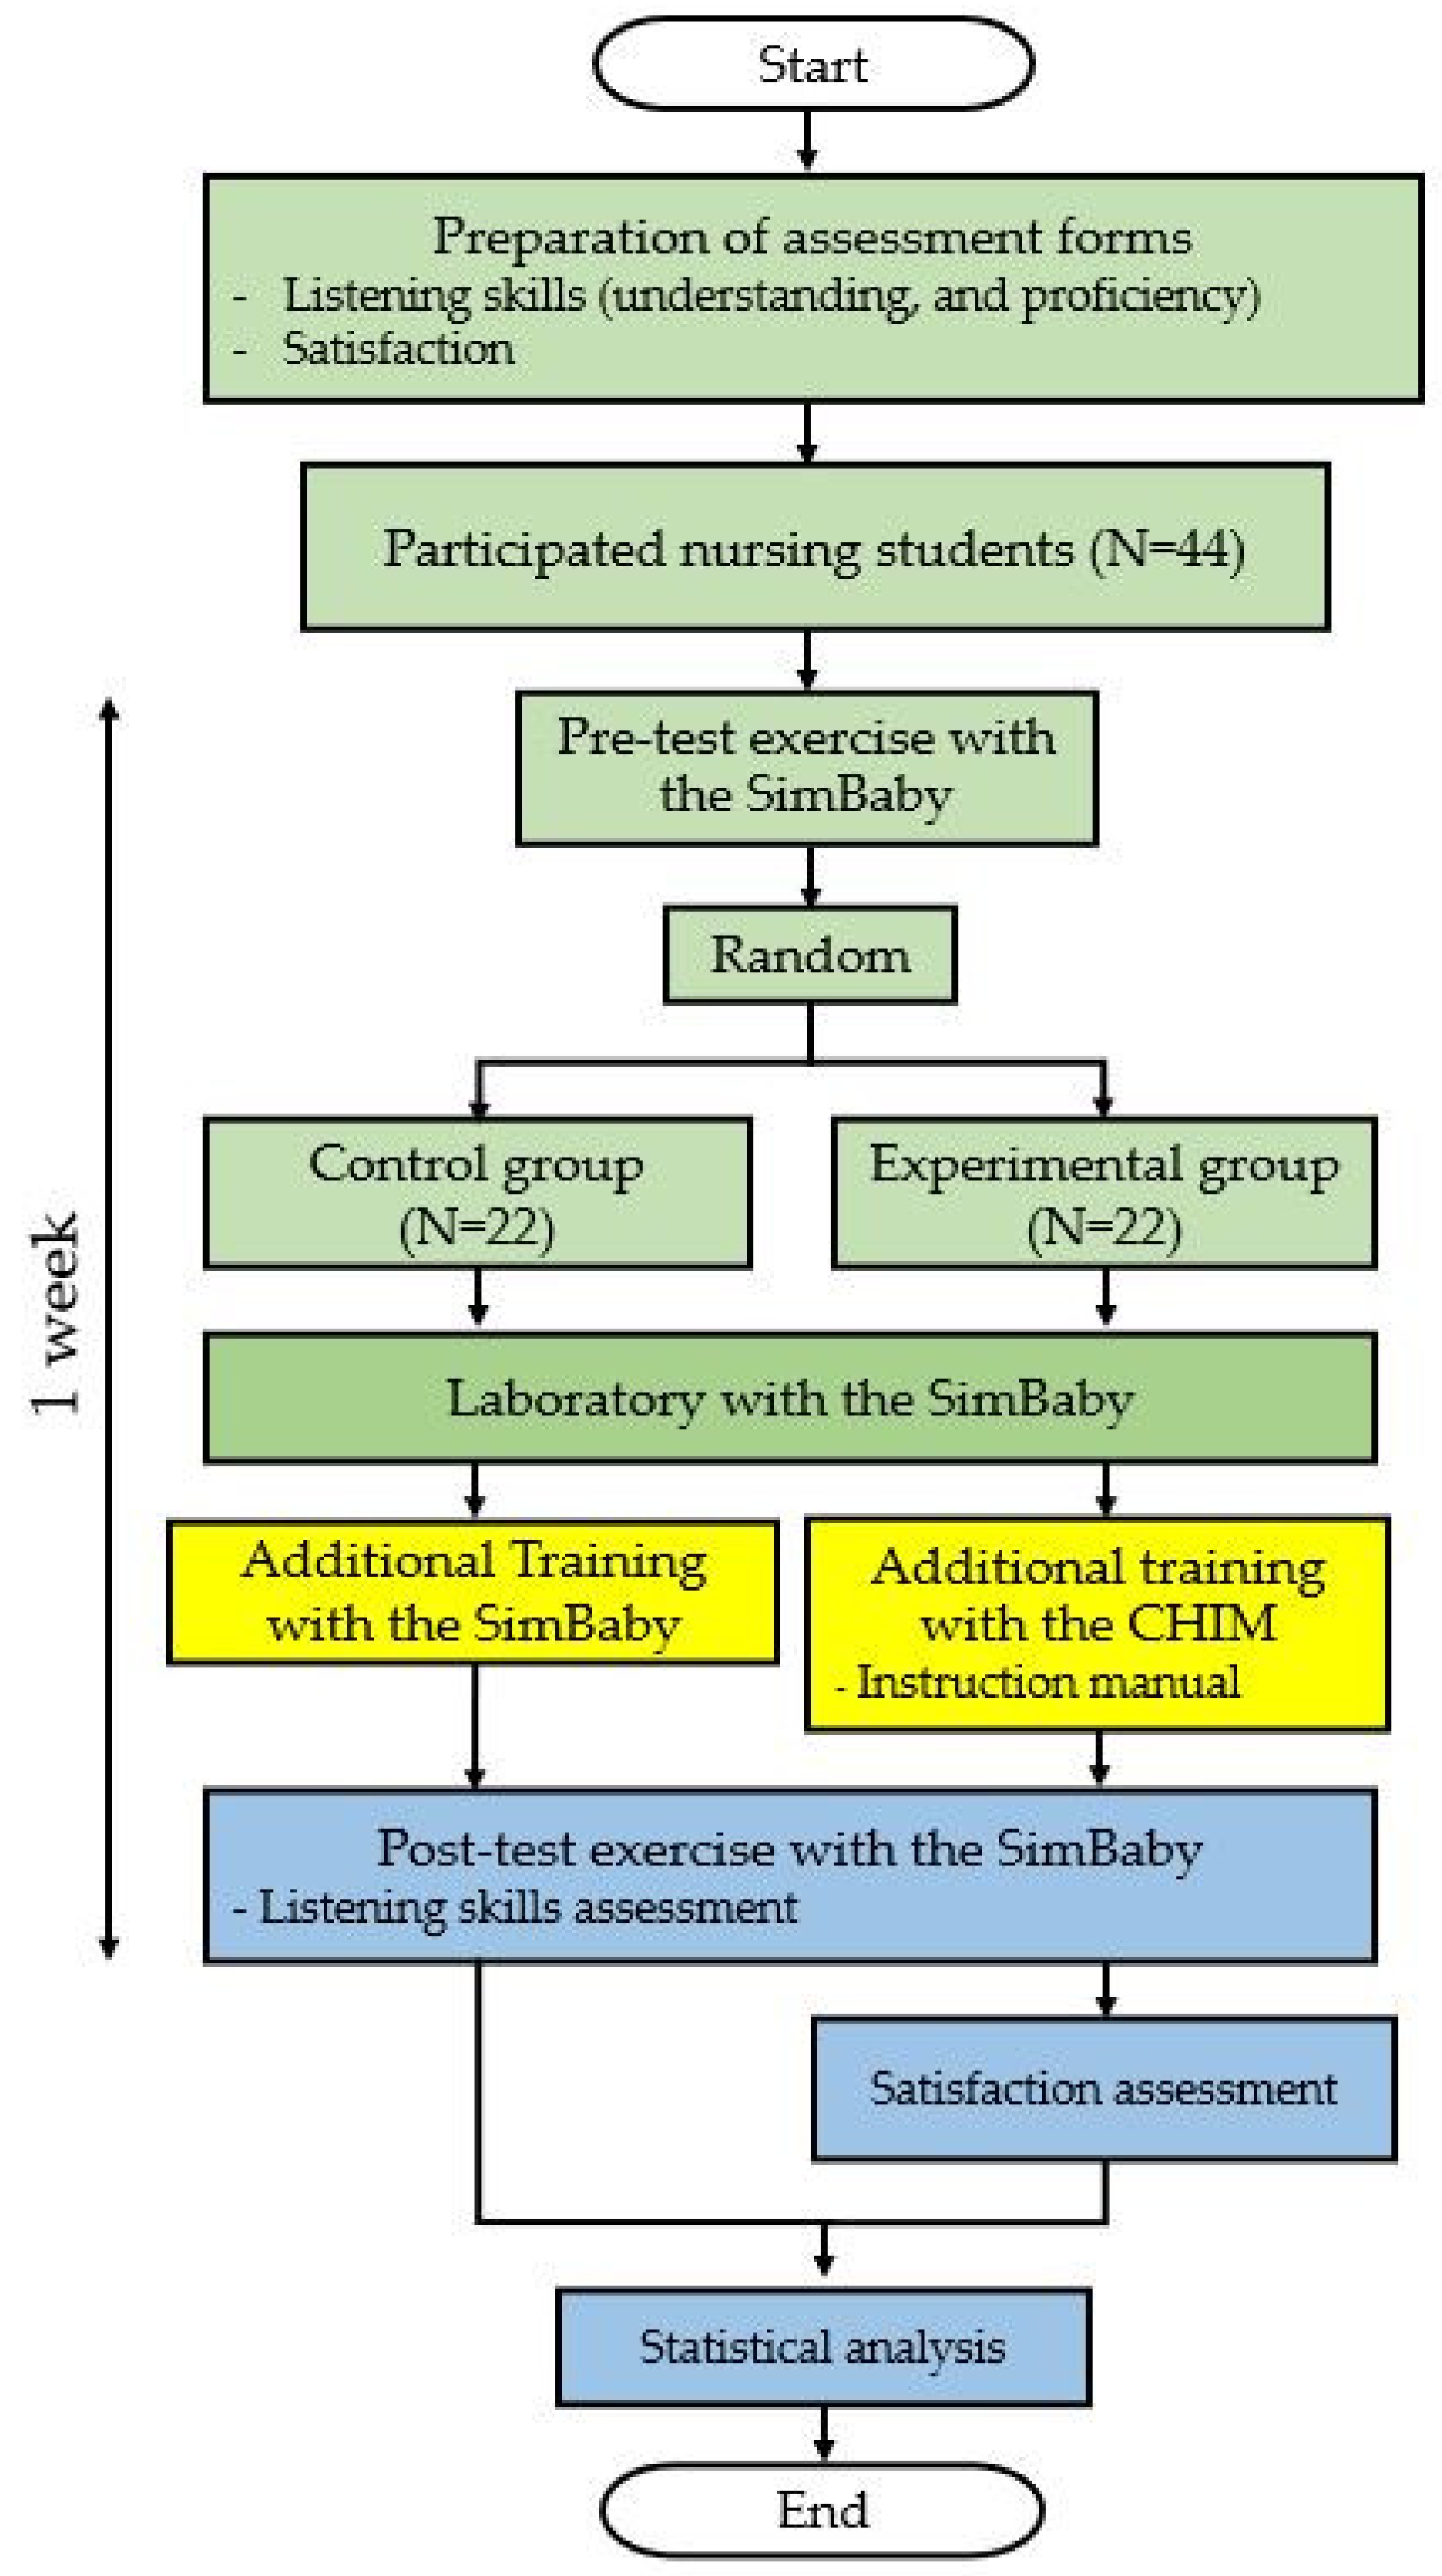
2.2.1. Hardware
The hardware consists of a child doll, control box, response box, and display screen; wires and signal cables are connected all.
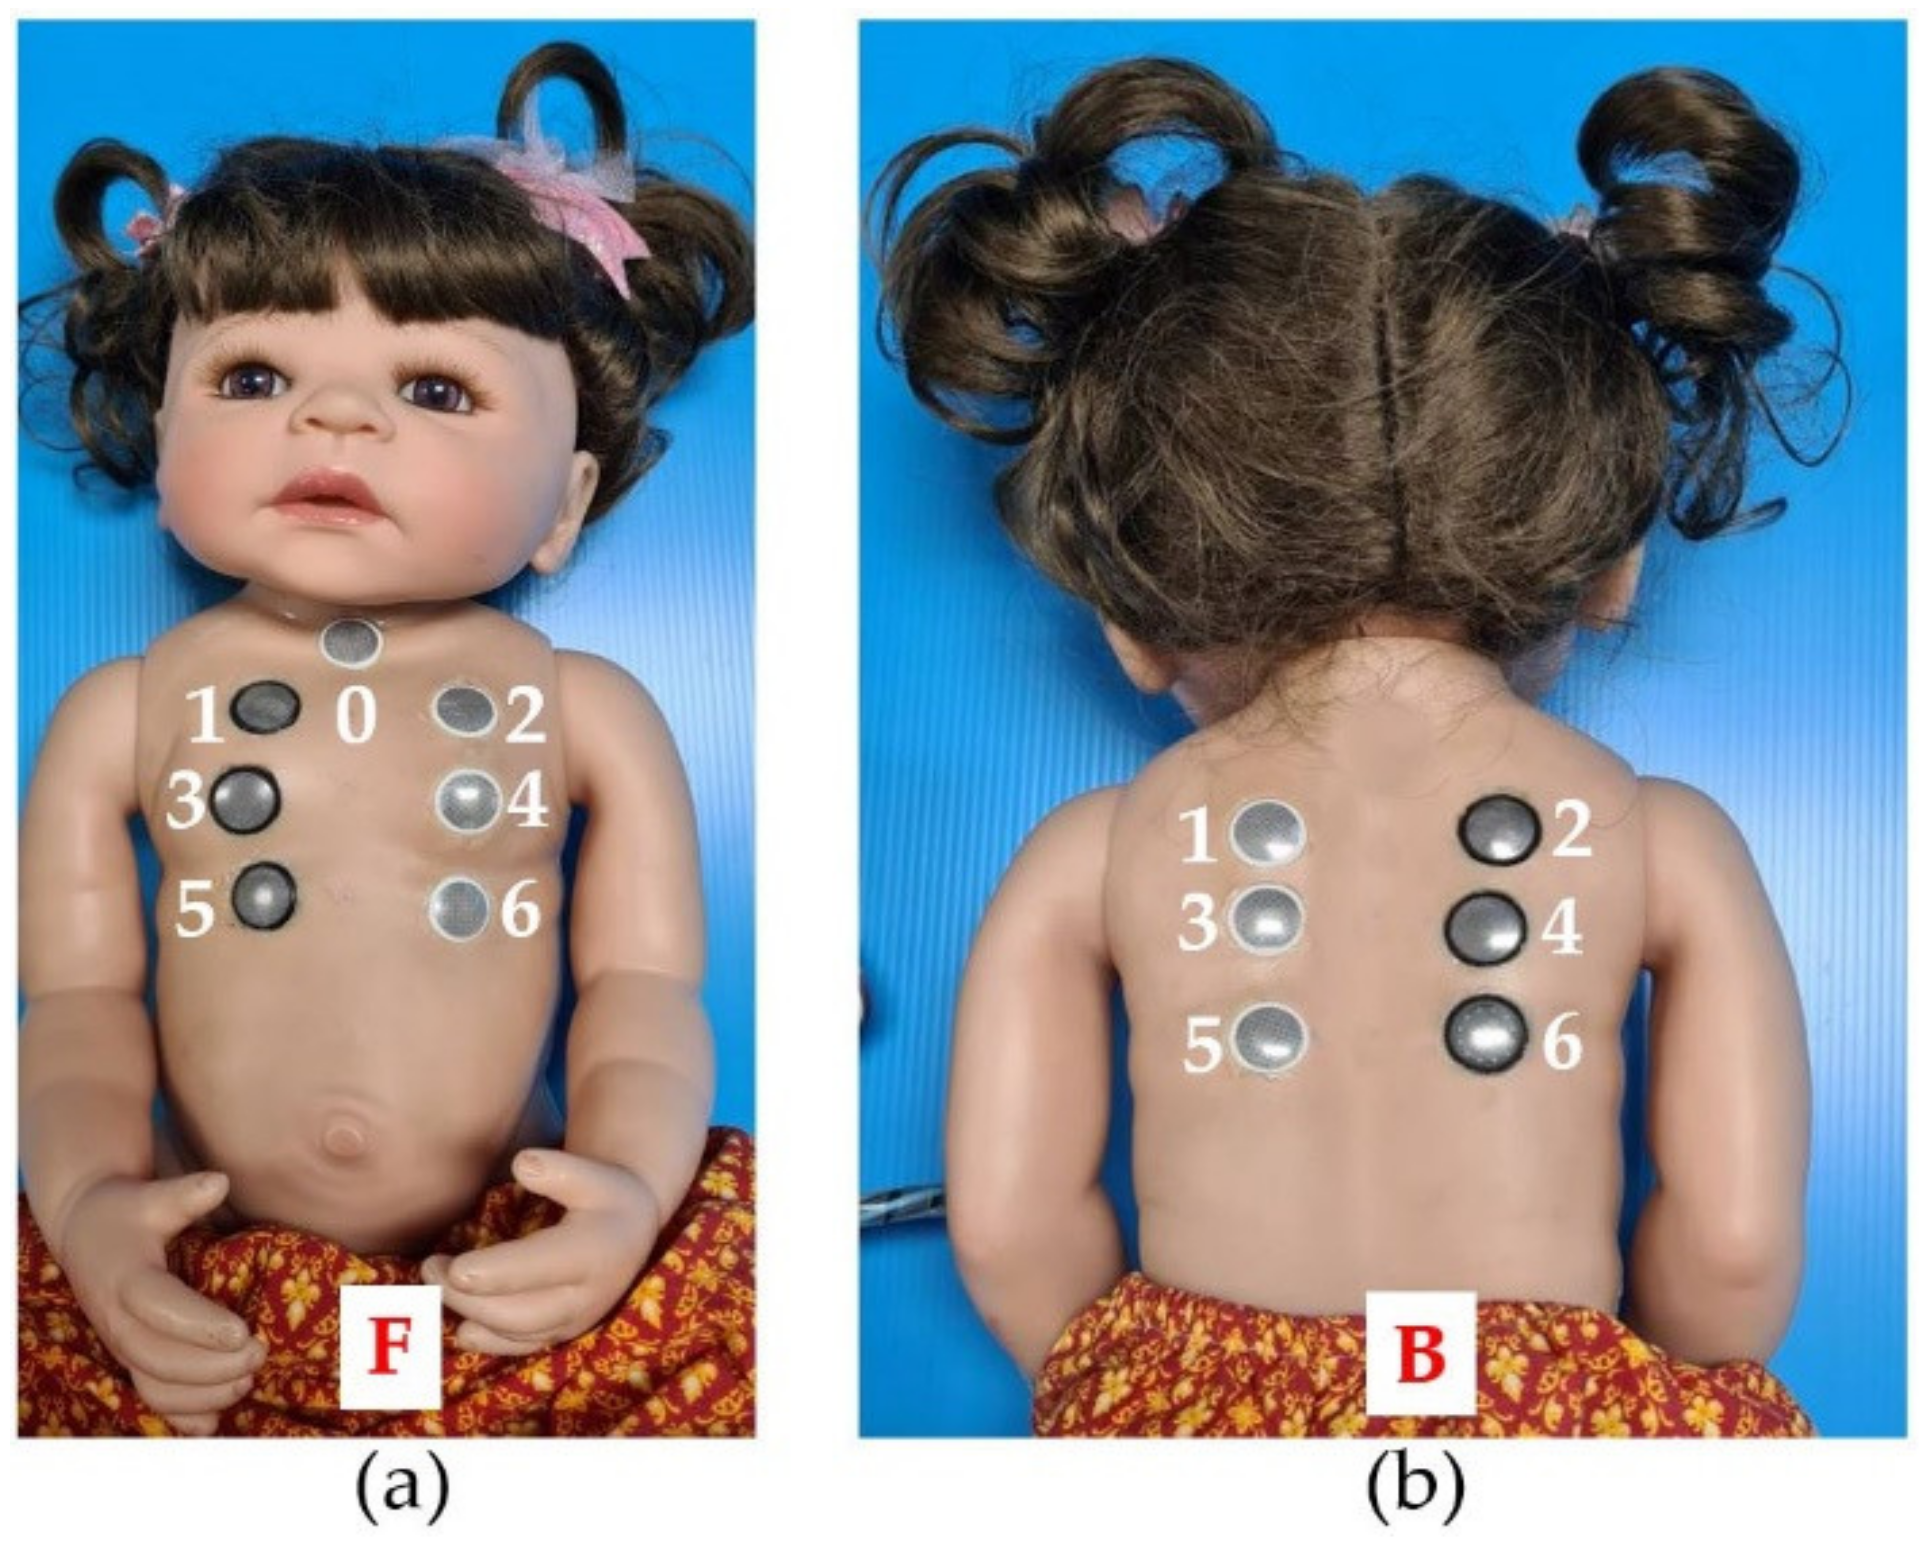
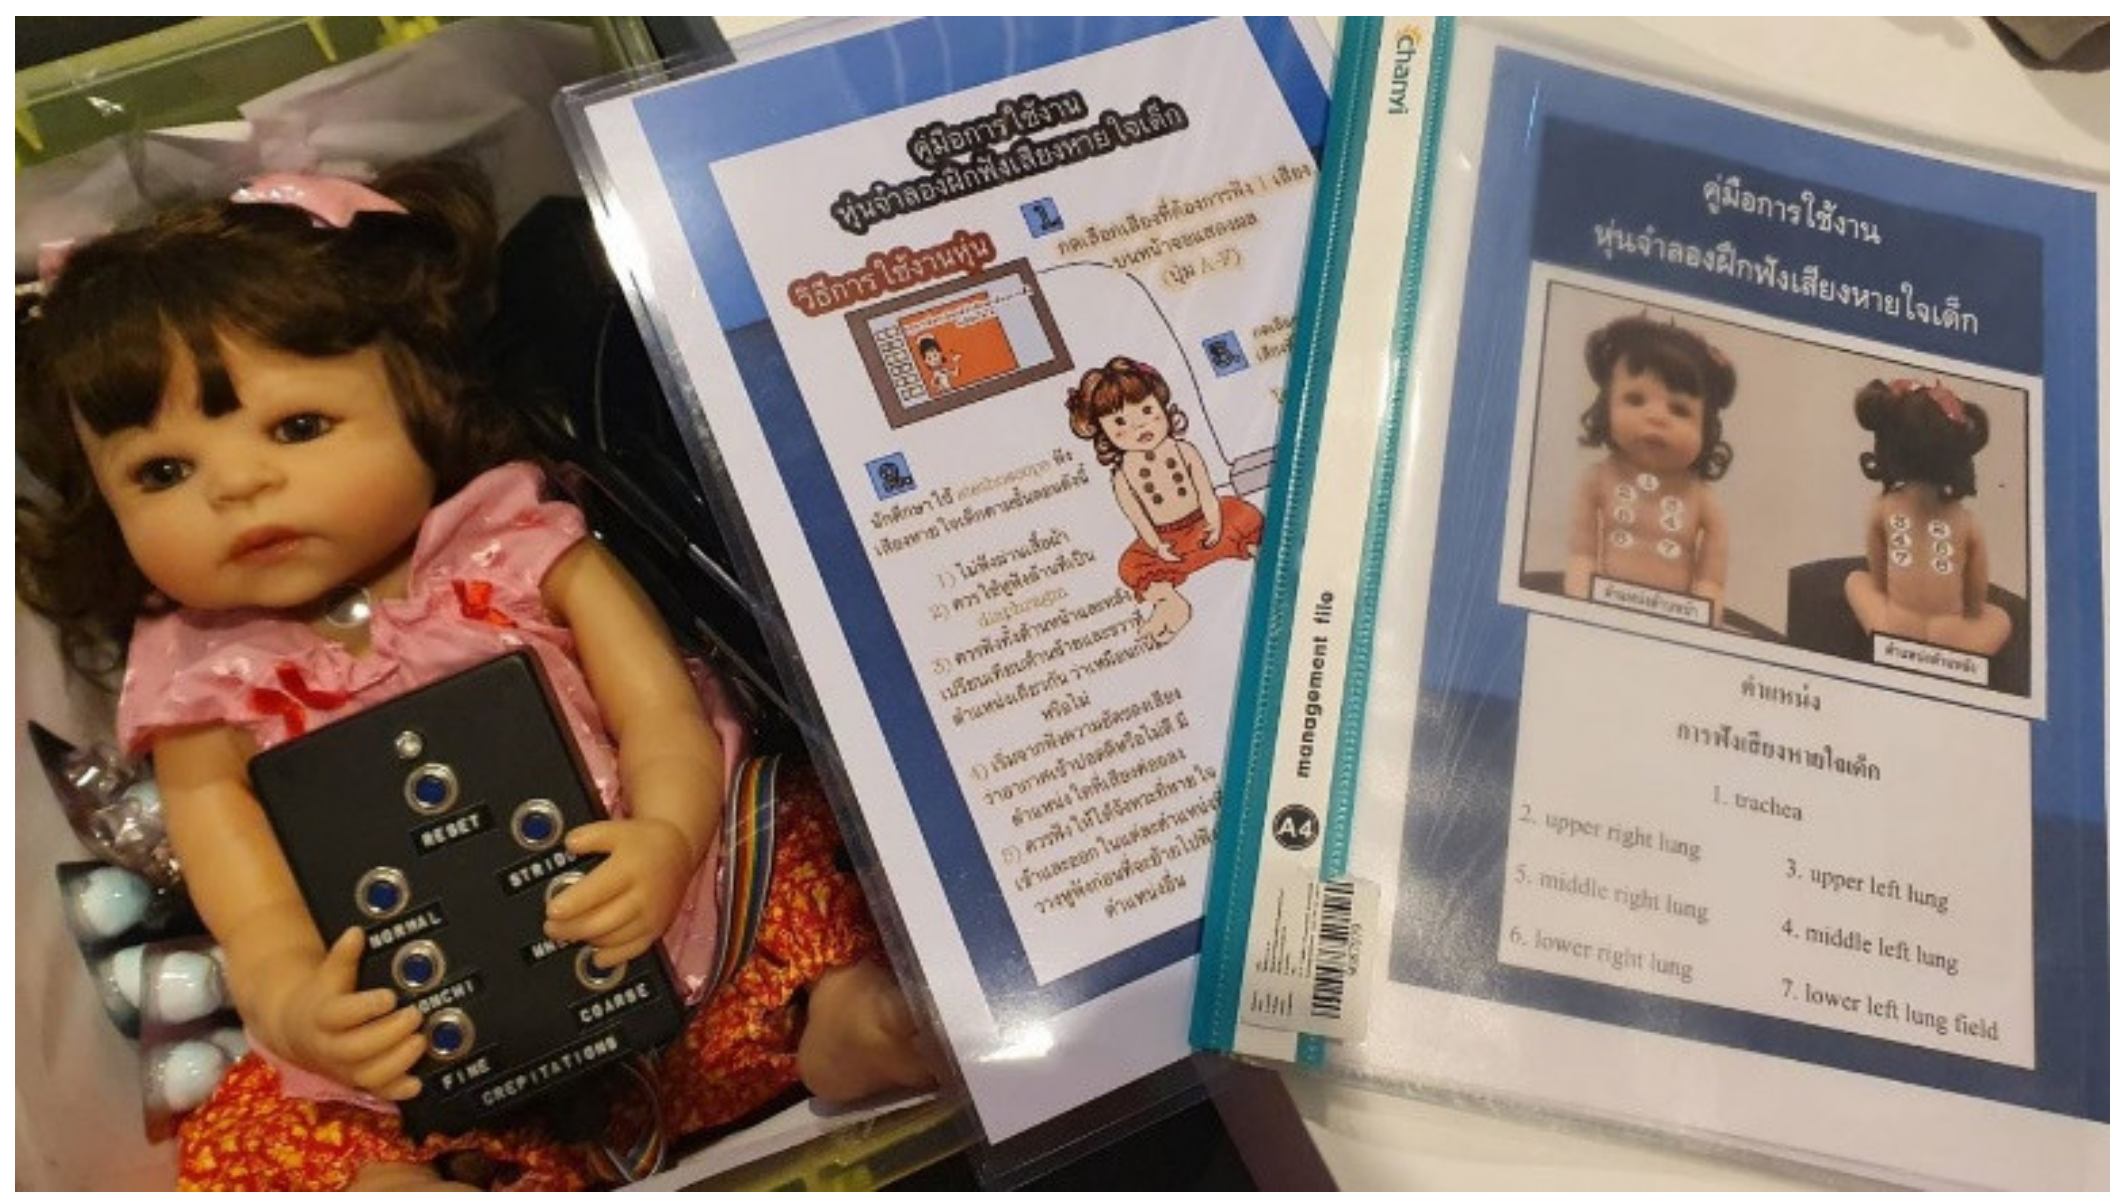
A 60 × 23 cm
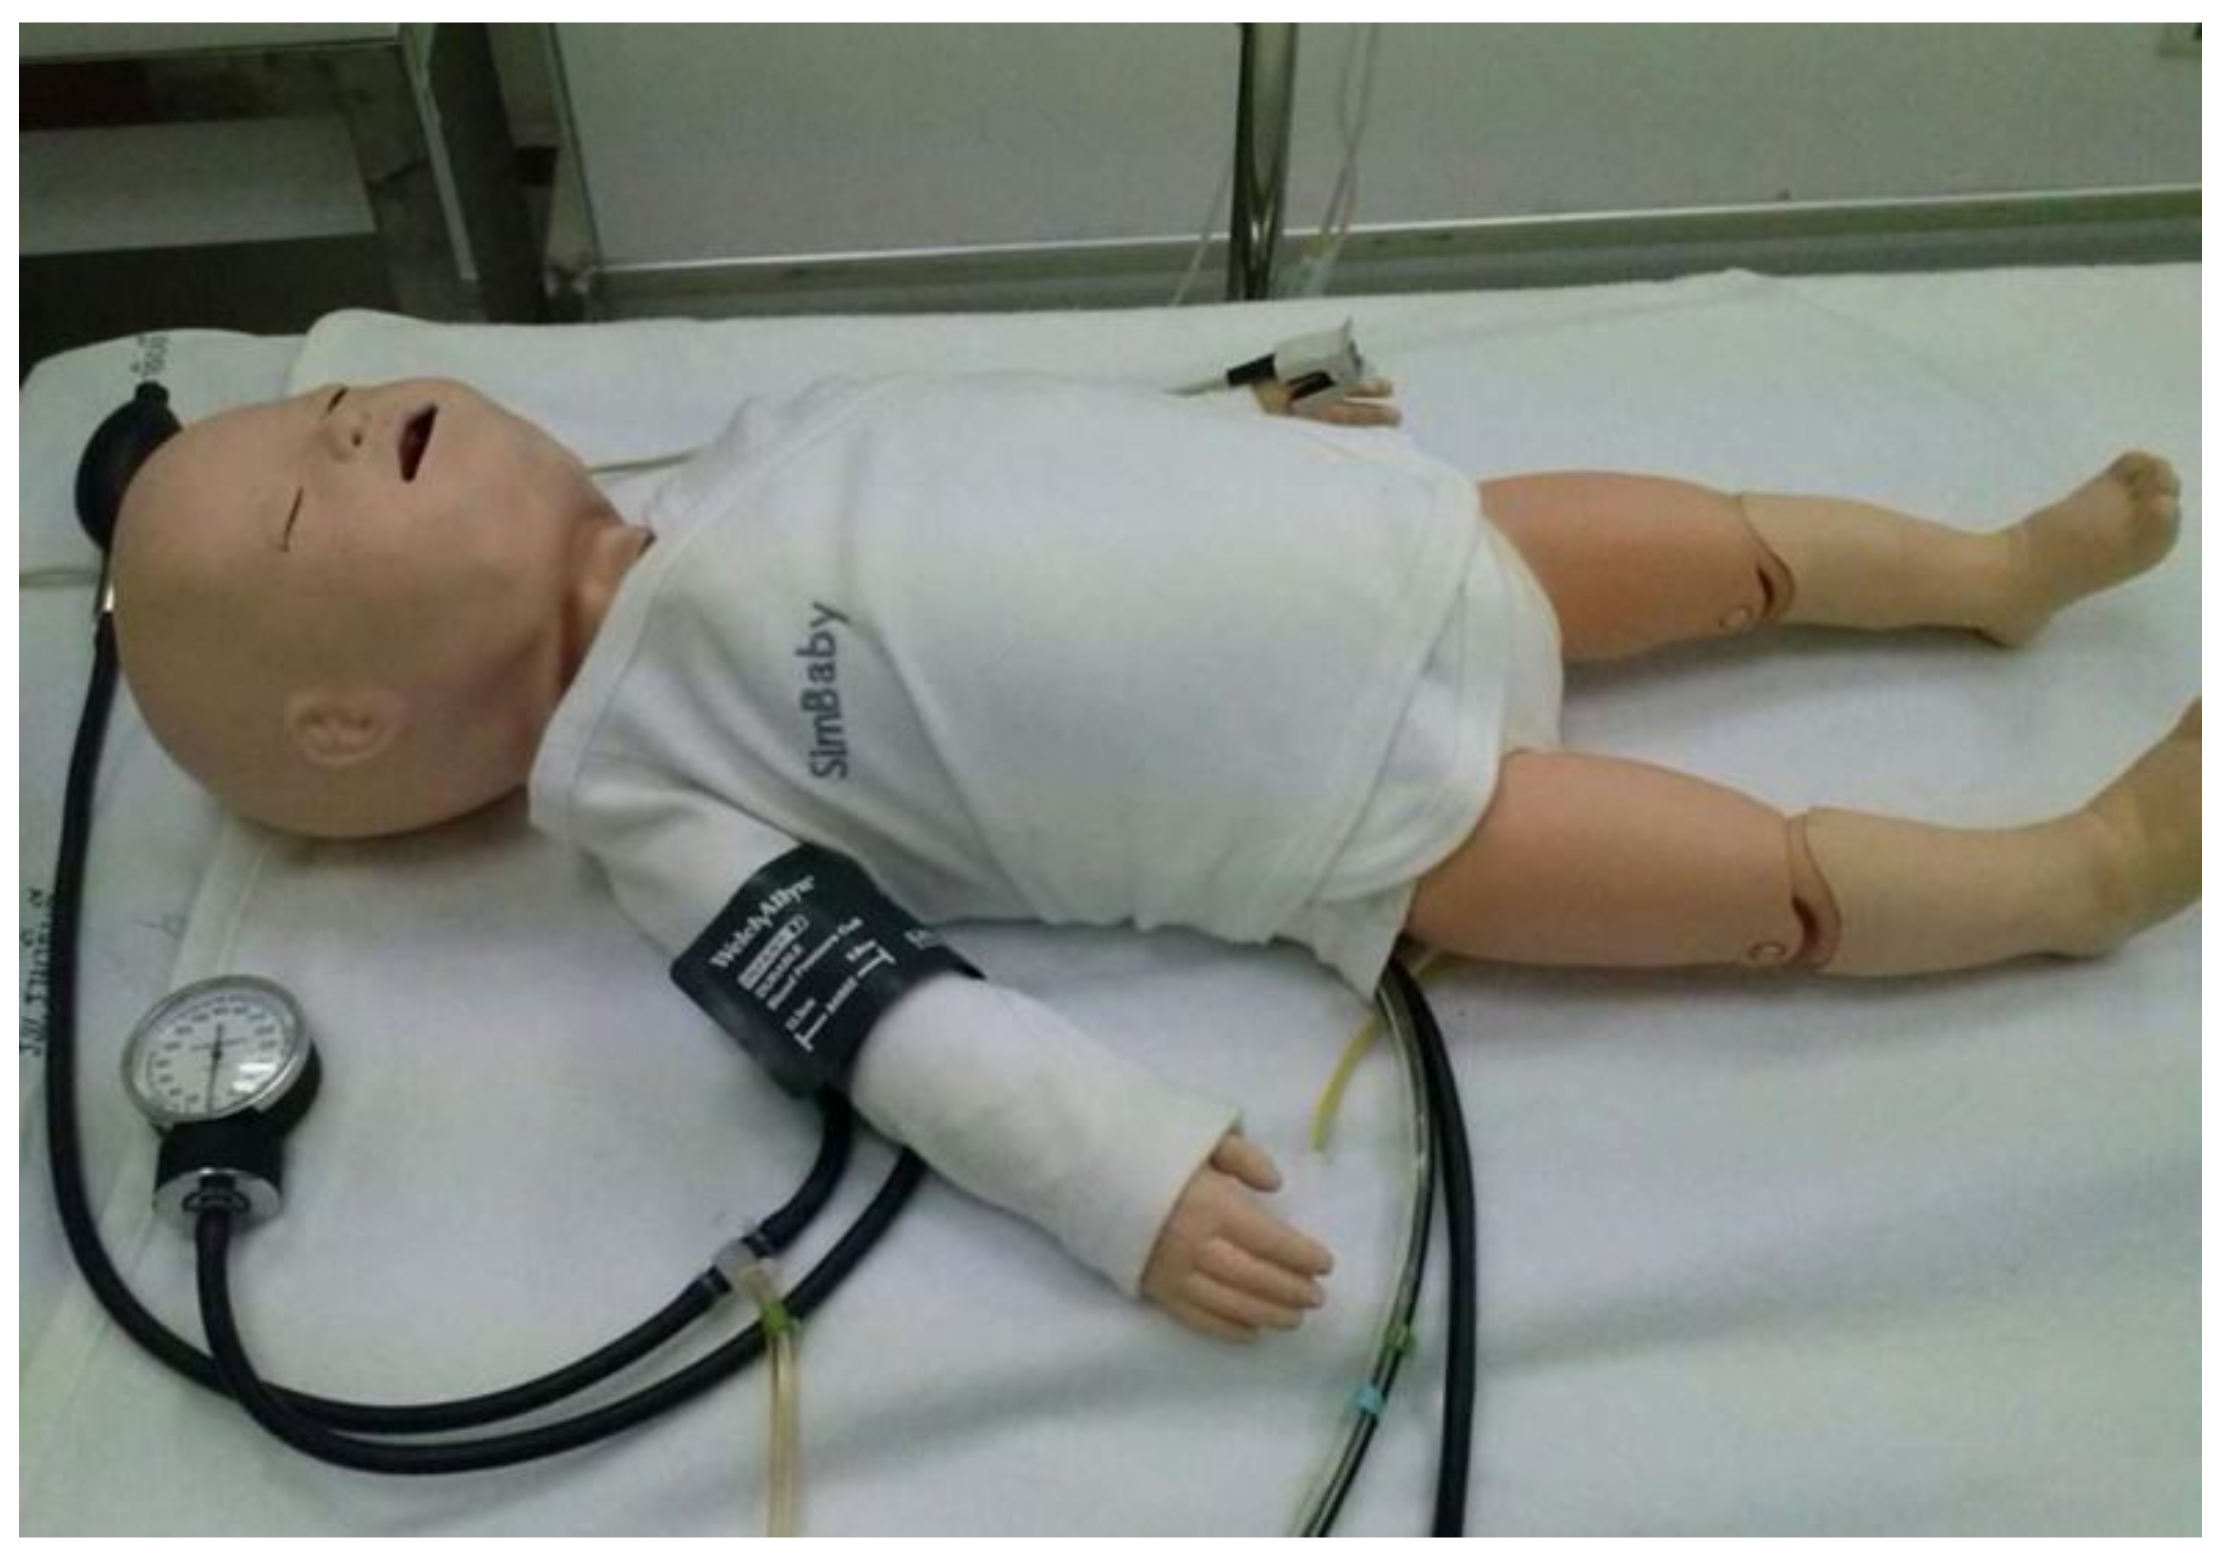
2 size child doll with skin made of silicone vinyl was selected as a model. It was cute and shiny, so it attracted attention, achieving the 1st step of Gagné’s learning theory (gaining attention). The silicone is soft, flexible, and lifelike, better than other dolls made of plastic and fabric. This size can represent children under three months. Then, its chest and back were pierced to make thirteen holes at different positions: seven at the chest and six at the back. The piercing positions were assigned according to the advice of experts mentioned in
Section 2.1.2. These positions clearly exhibit the breathing sounds frequently detected in most physical examinations of patients [
10]. Therefore, a position assignment like this may help nursing students become familiar with the relationship between the position and breathing sounds and compensate for one of the SimBaby limitations, increasing their proficiency. Finally, all holes were inserted with earphones, which amplified the breathing sounds transmitted from the control box. Small gaps between the earphones and skin were filled with silicone glue to prevent leaked sounds and enhance durability.
Figure 4 shows a complete child doll viewed on (a) the front and (b) the back. Moreover, numbers 0–6 and letters F and B were used to identify breathing sound types generated by the control box, explained later. F and B stand for the front and back sides, respectively, while numbers 0–6 represent positions. In actual use, the child doll had clothing for realism.
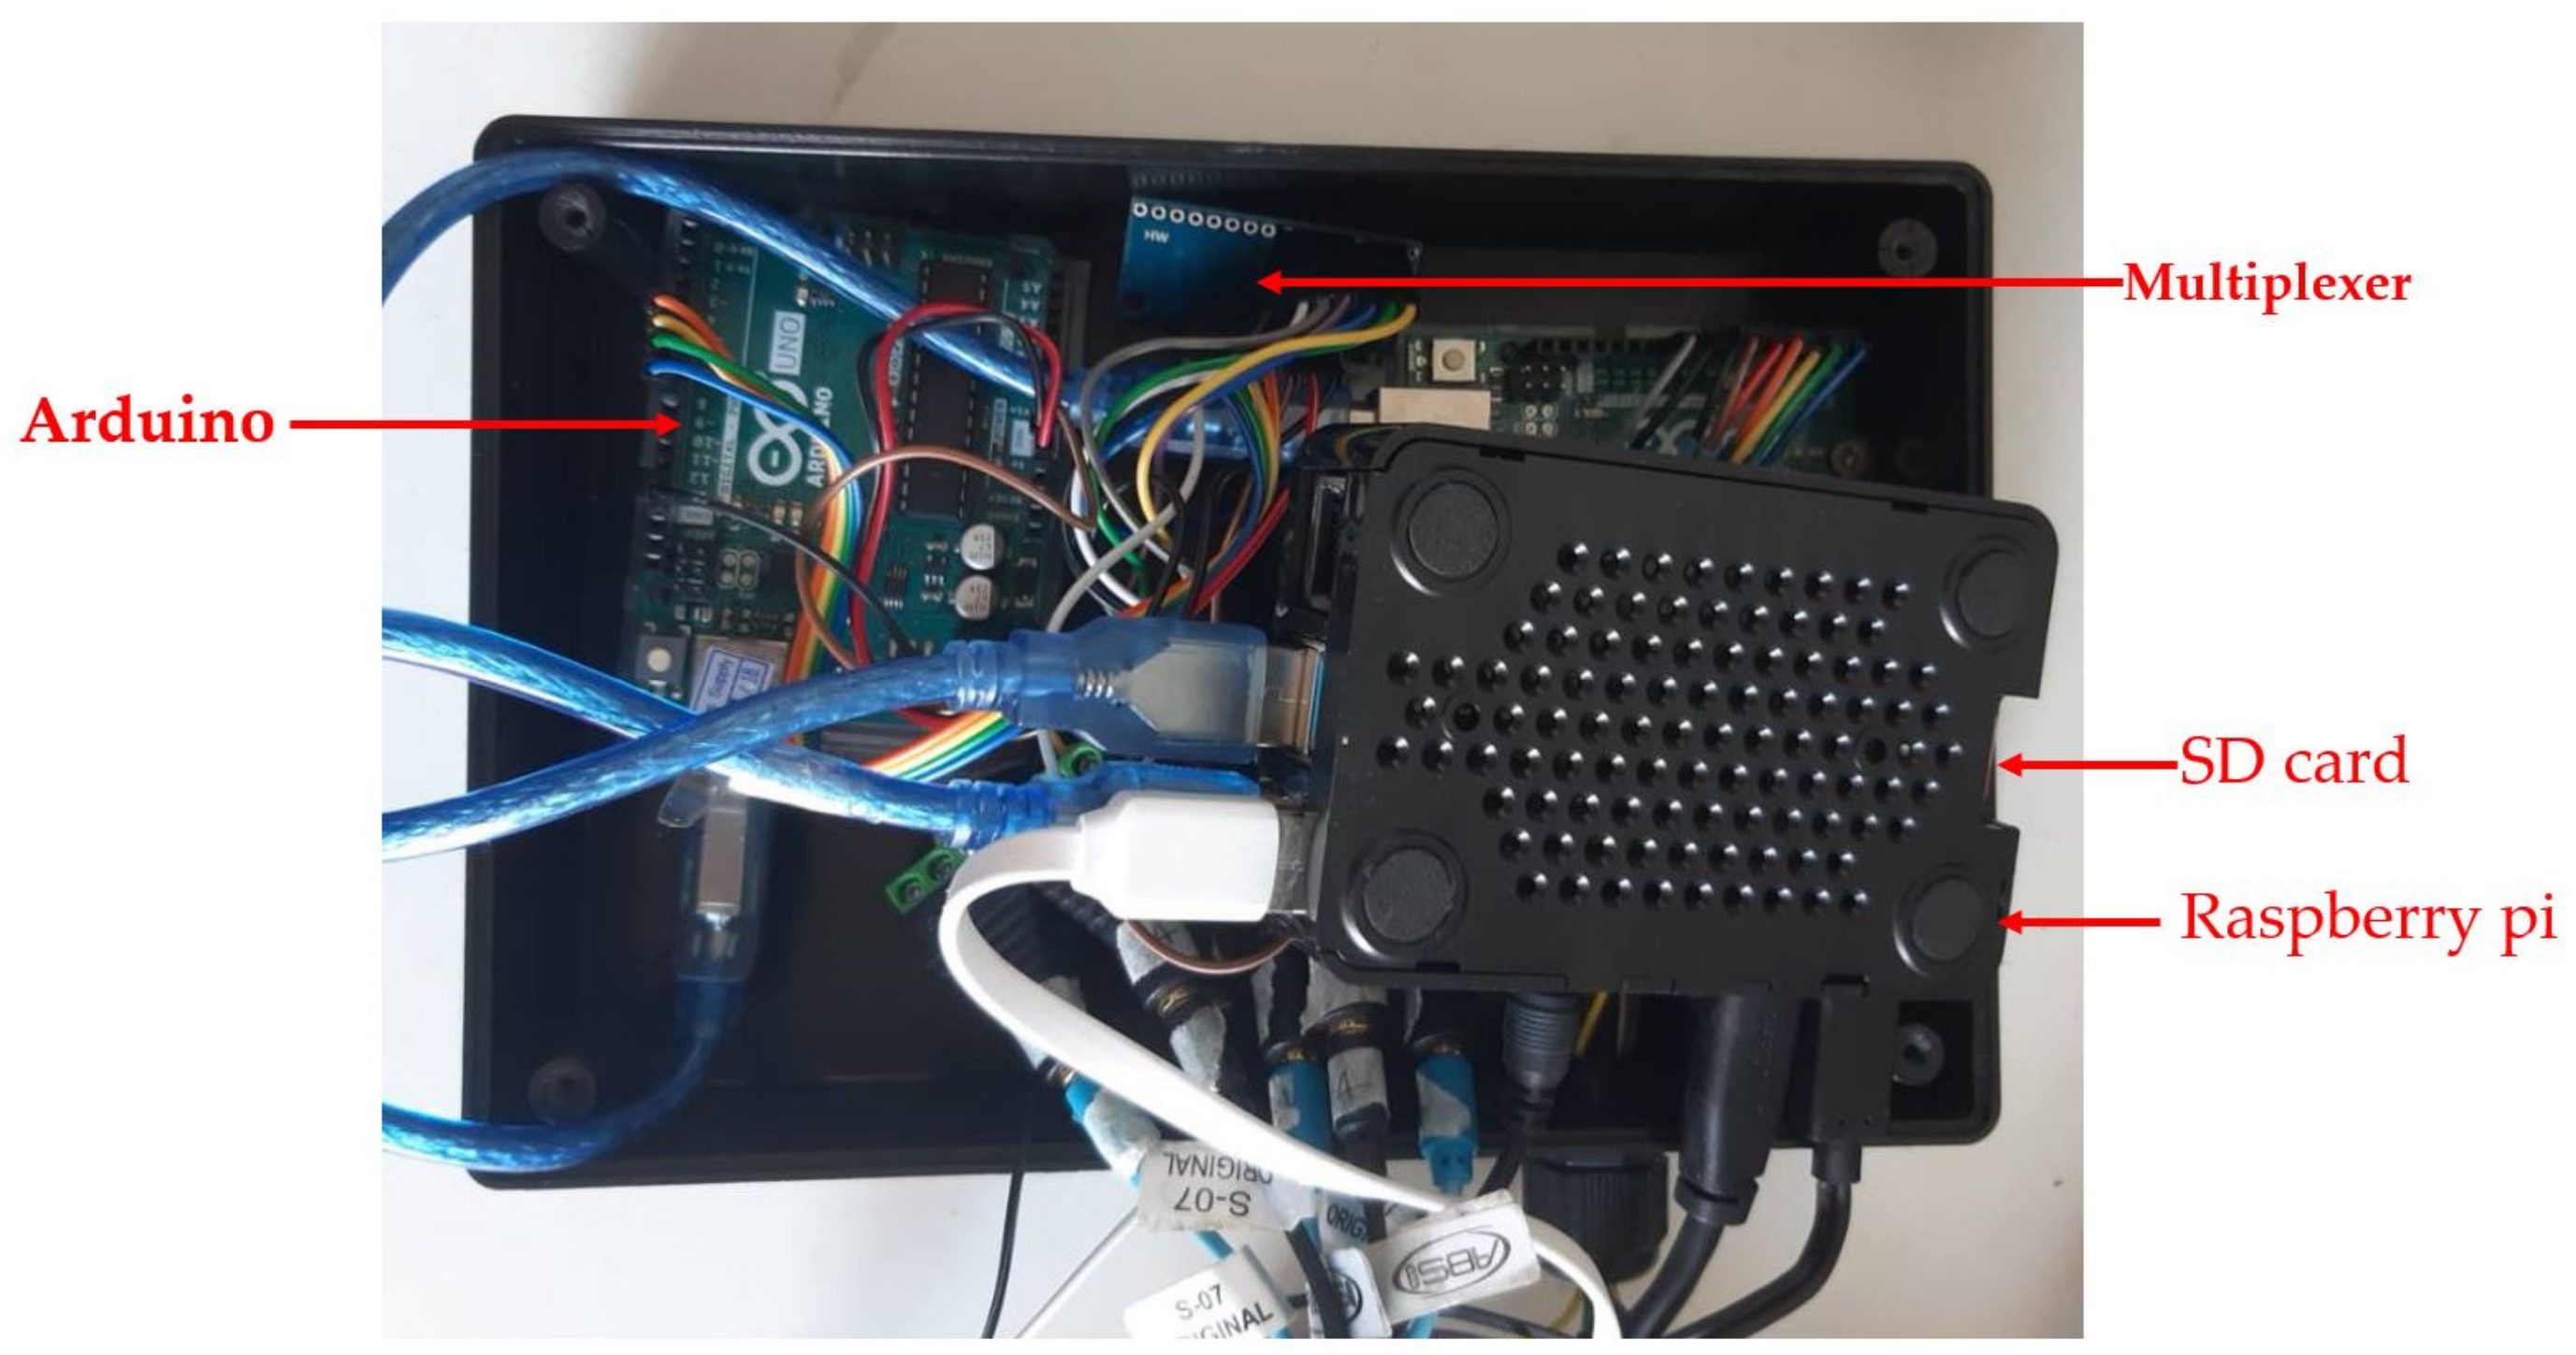
All devices were controlled by the control box; therefore, it is an essential part of the CHIM containing Raspberry pi4, a multiplexer, Arduino, an SD card, an adapter, etc.
Figure 5 shows the sample devices inside the control box.
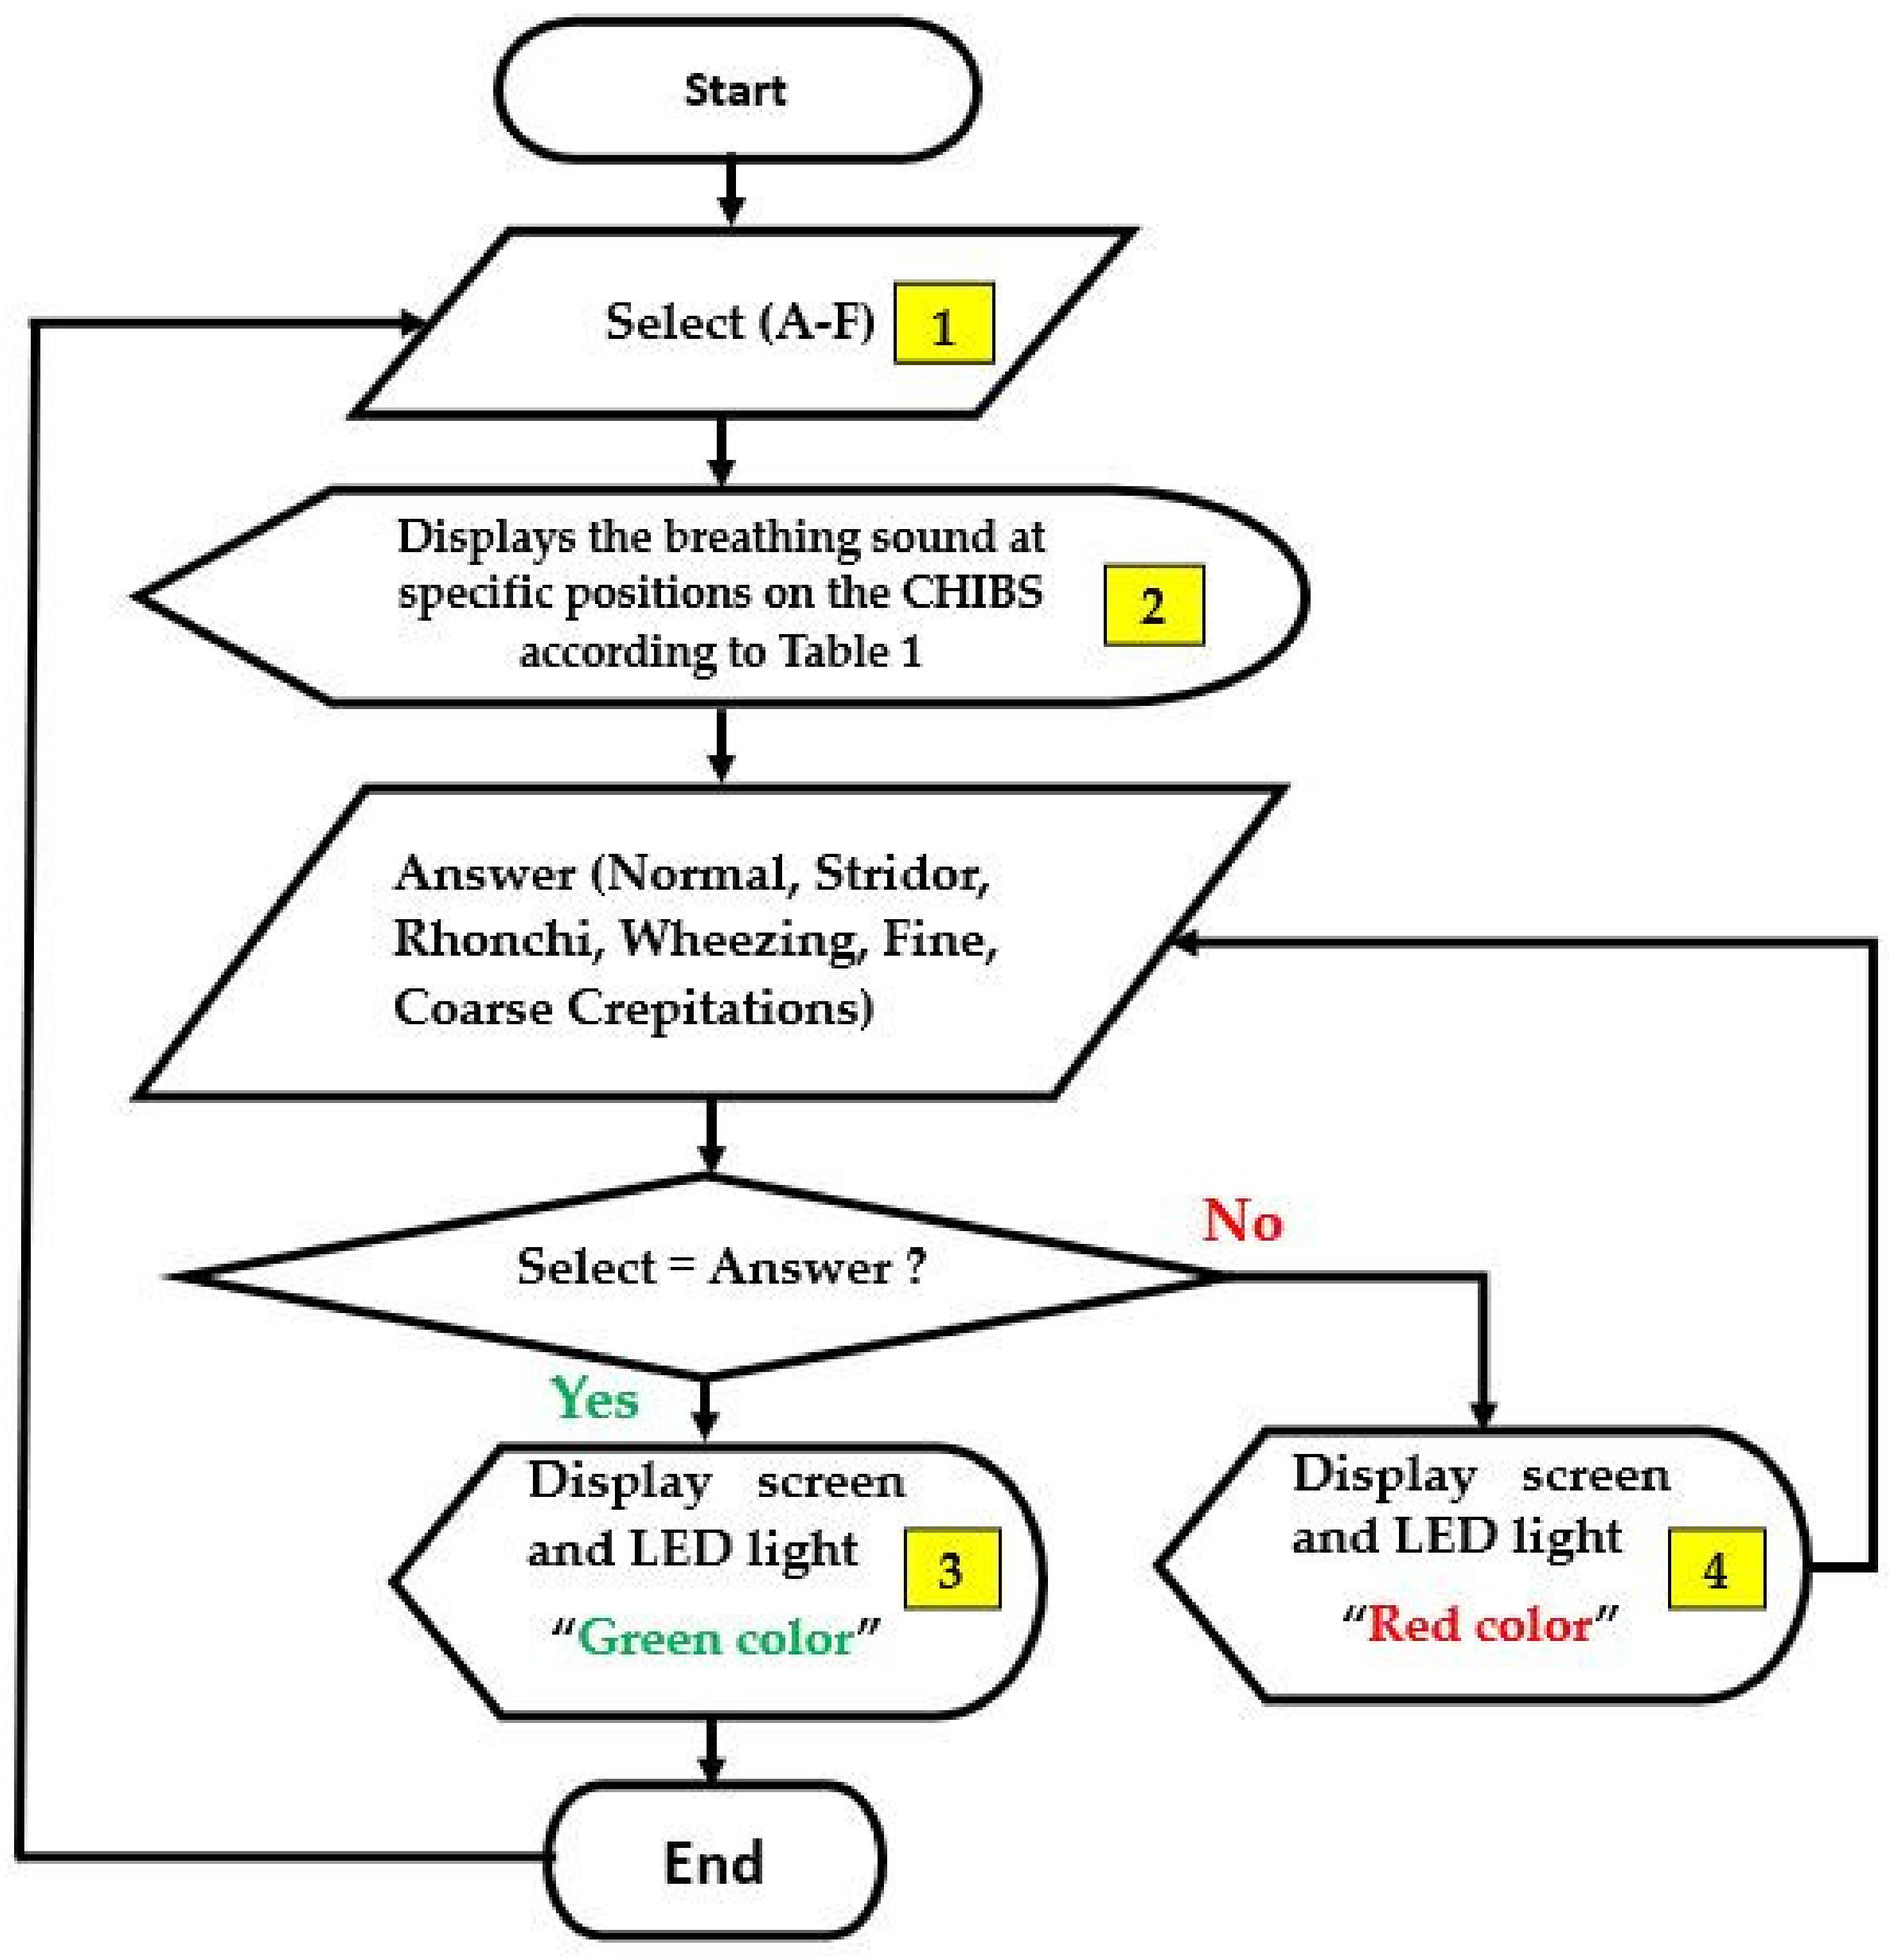
The Raspberry pi4 is a small computer working as input, output, and processing units. The algorithm that controlled the CHIM operations was written and coded in the C programming language, then embedded in the Raspberry pi4 operating system. The major operation accurately assigns the breathing sound types in
Table 1 to match the earphones’ positions in
Figure 4.
Table 1 is the relationship between breathing sound types and positions mentioned in
Section 2.1.2. In addition,
Figure 6 shows a flowchart describing the algorithm. The small yellow boxes represent the display screen discussed later next.
The multiplexer or data selector is a device that selects digital inputs and forwards the selected input. In this research, it was employed to select the breathing sounds and transmit them to specific position outputs.
The Arduino is a microcontroller that works with a multiplexer to produce breathing sounds precisely as designed.
The SD card was used to store images, breathing sounds, codes, programs, etc., which were required to support the various device functions. Notably, the breathing sounds employed in
Table 1 were representative sounds selected from more than 30 samples of online media by the experts mentioned in
Section 2.1.2.
The adaptor was used for converting 220 V to 5 V AC.
In fact, the CHIM still has other devices, but they were not reported in this article since it is a prototype in the development process and upgrade for commercial products.
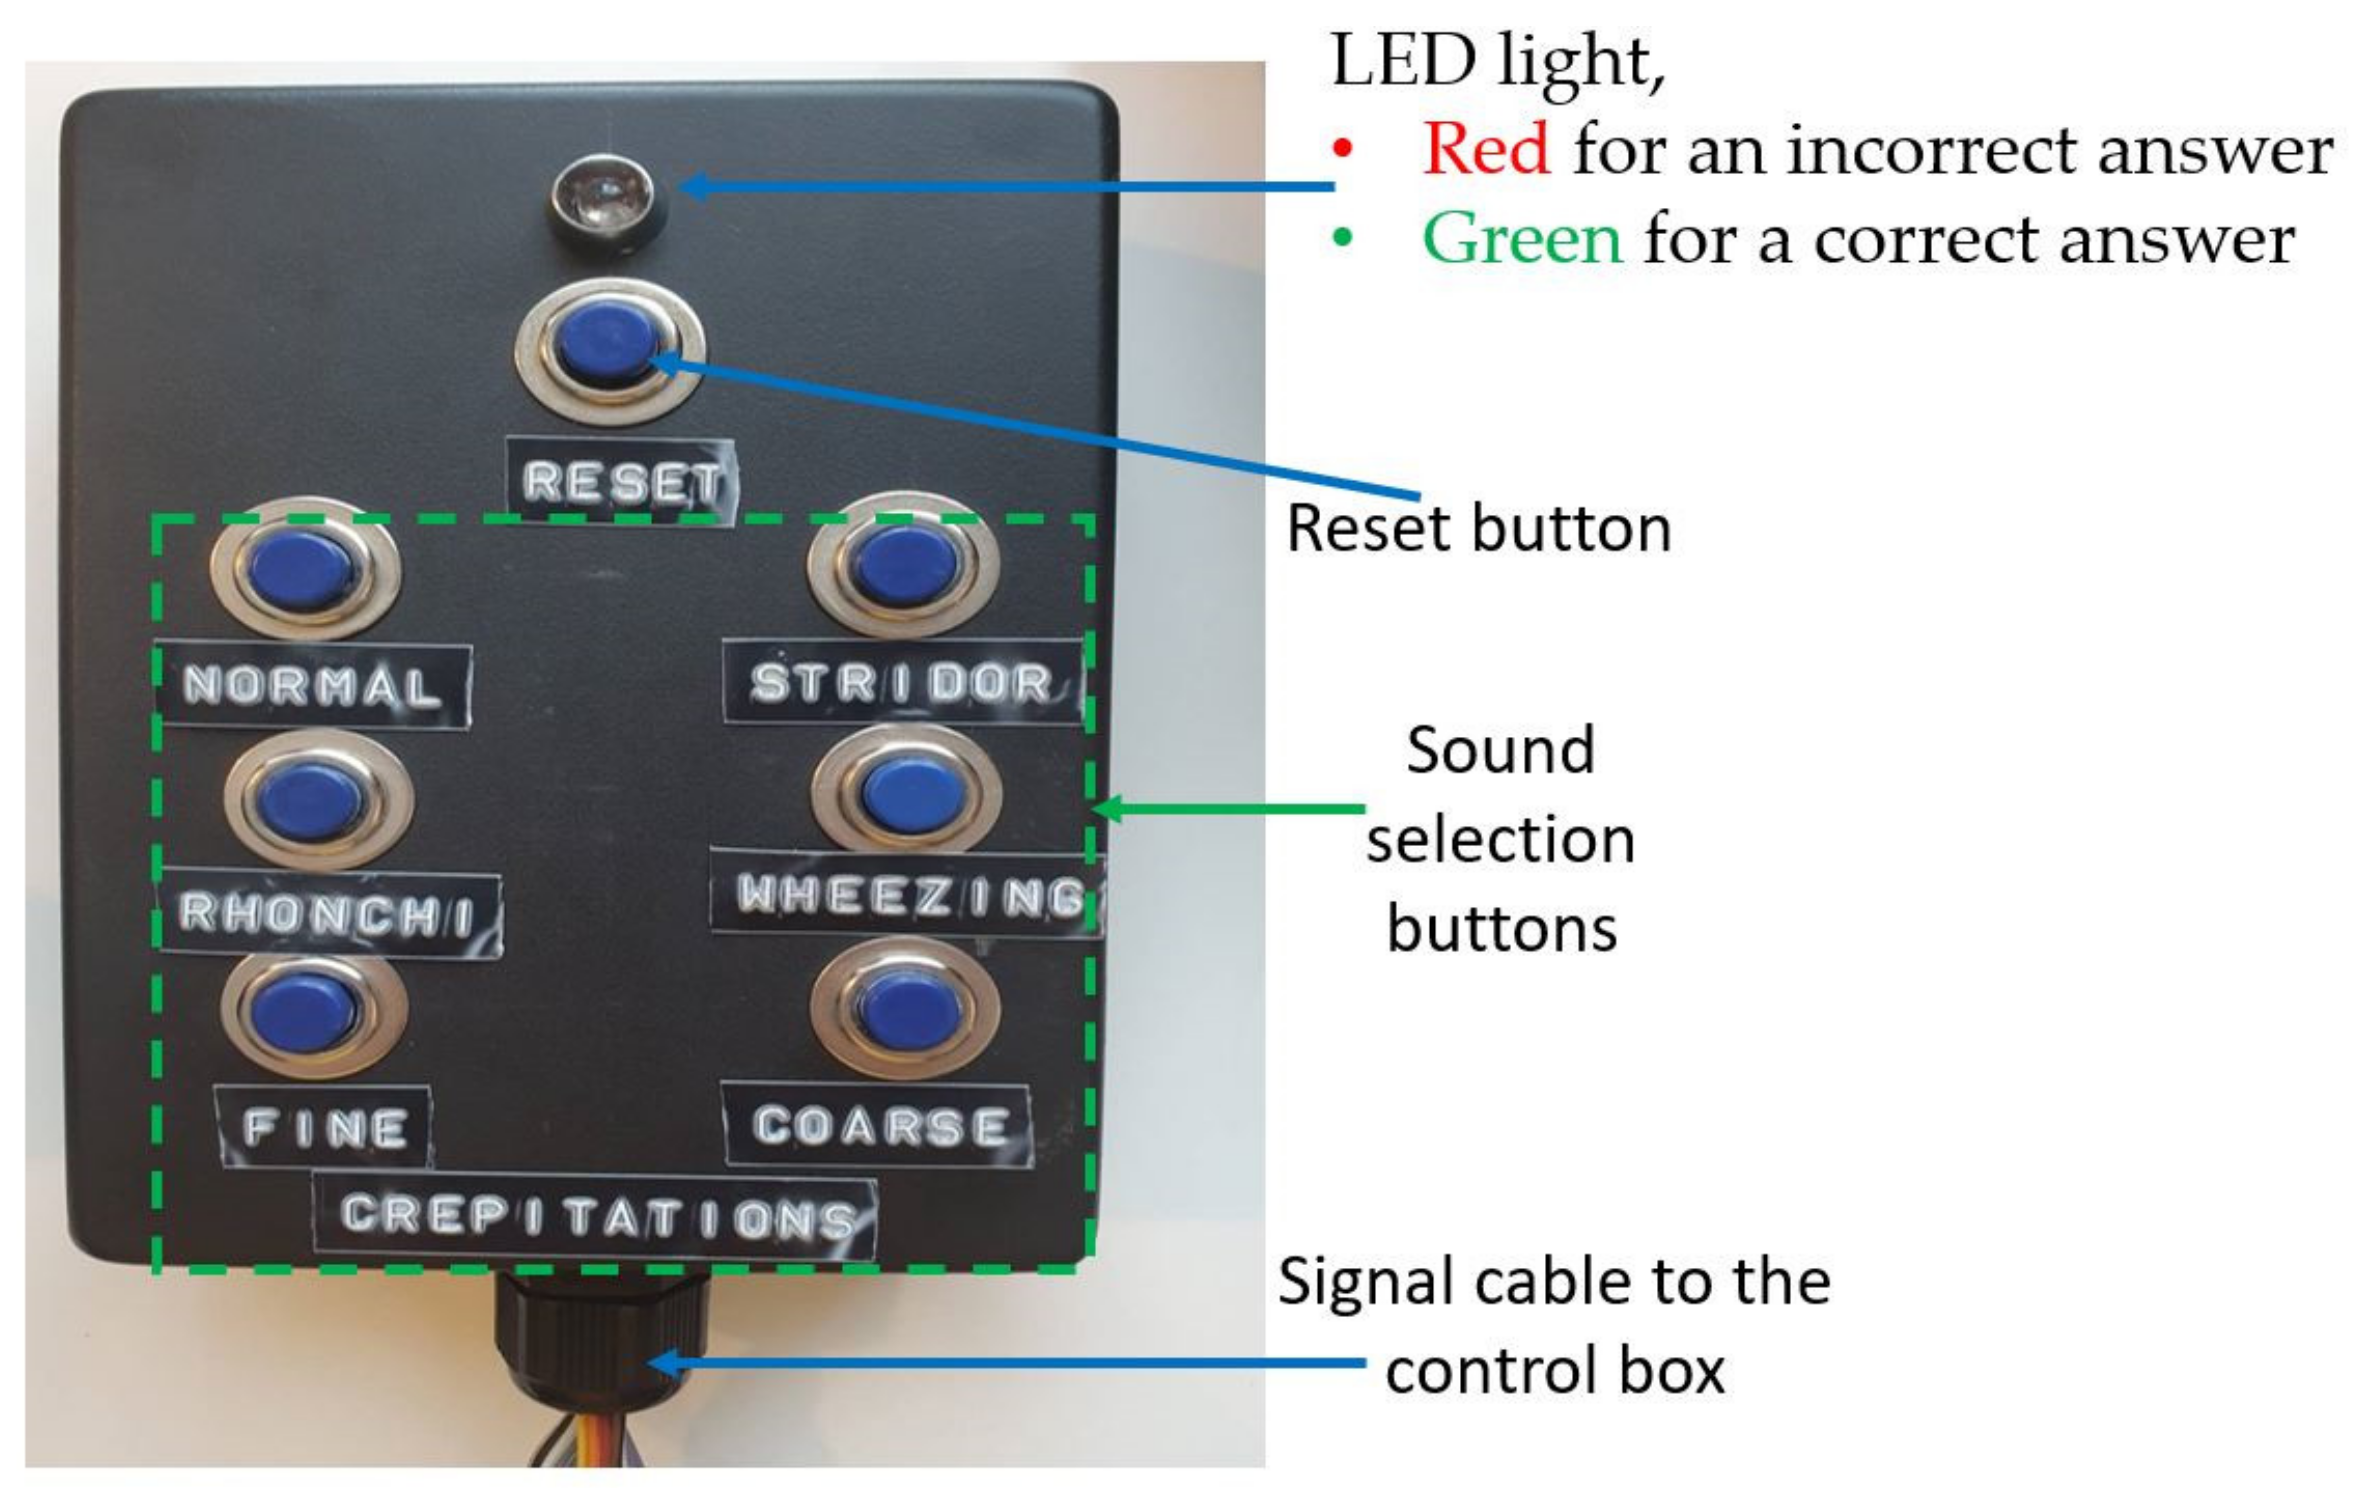
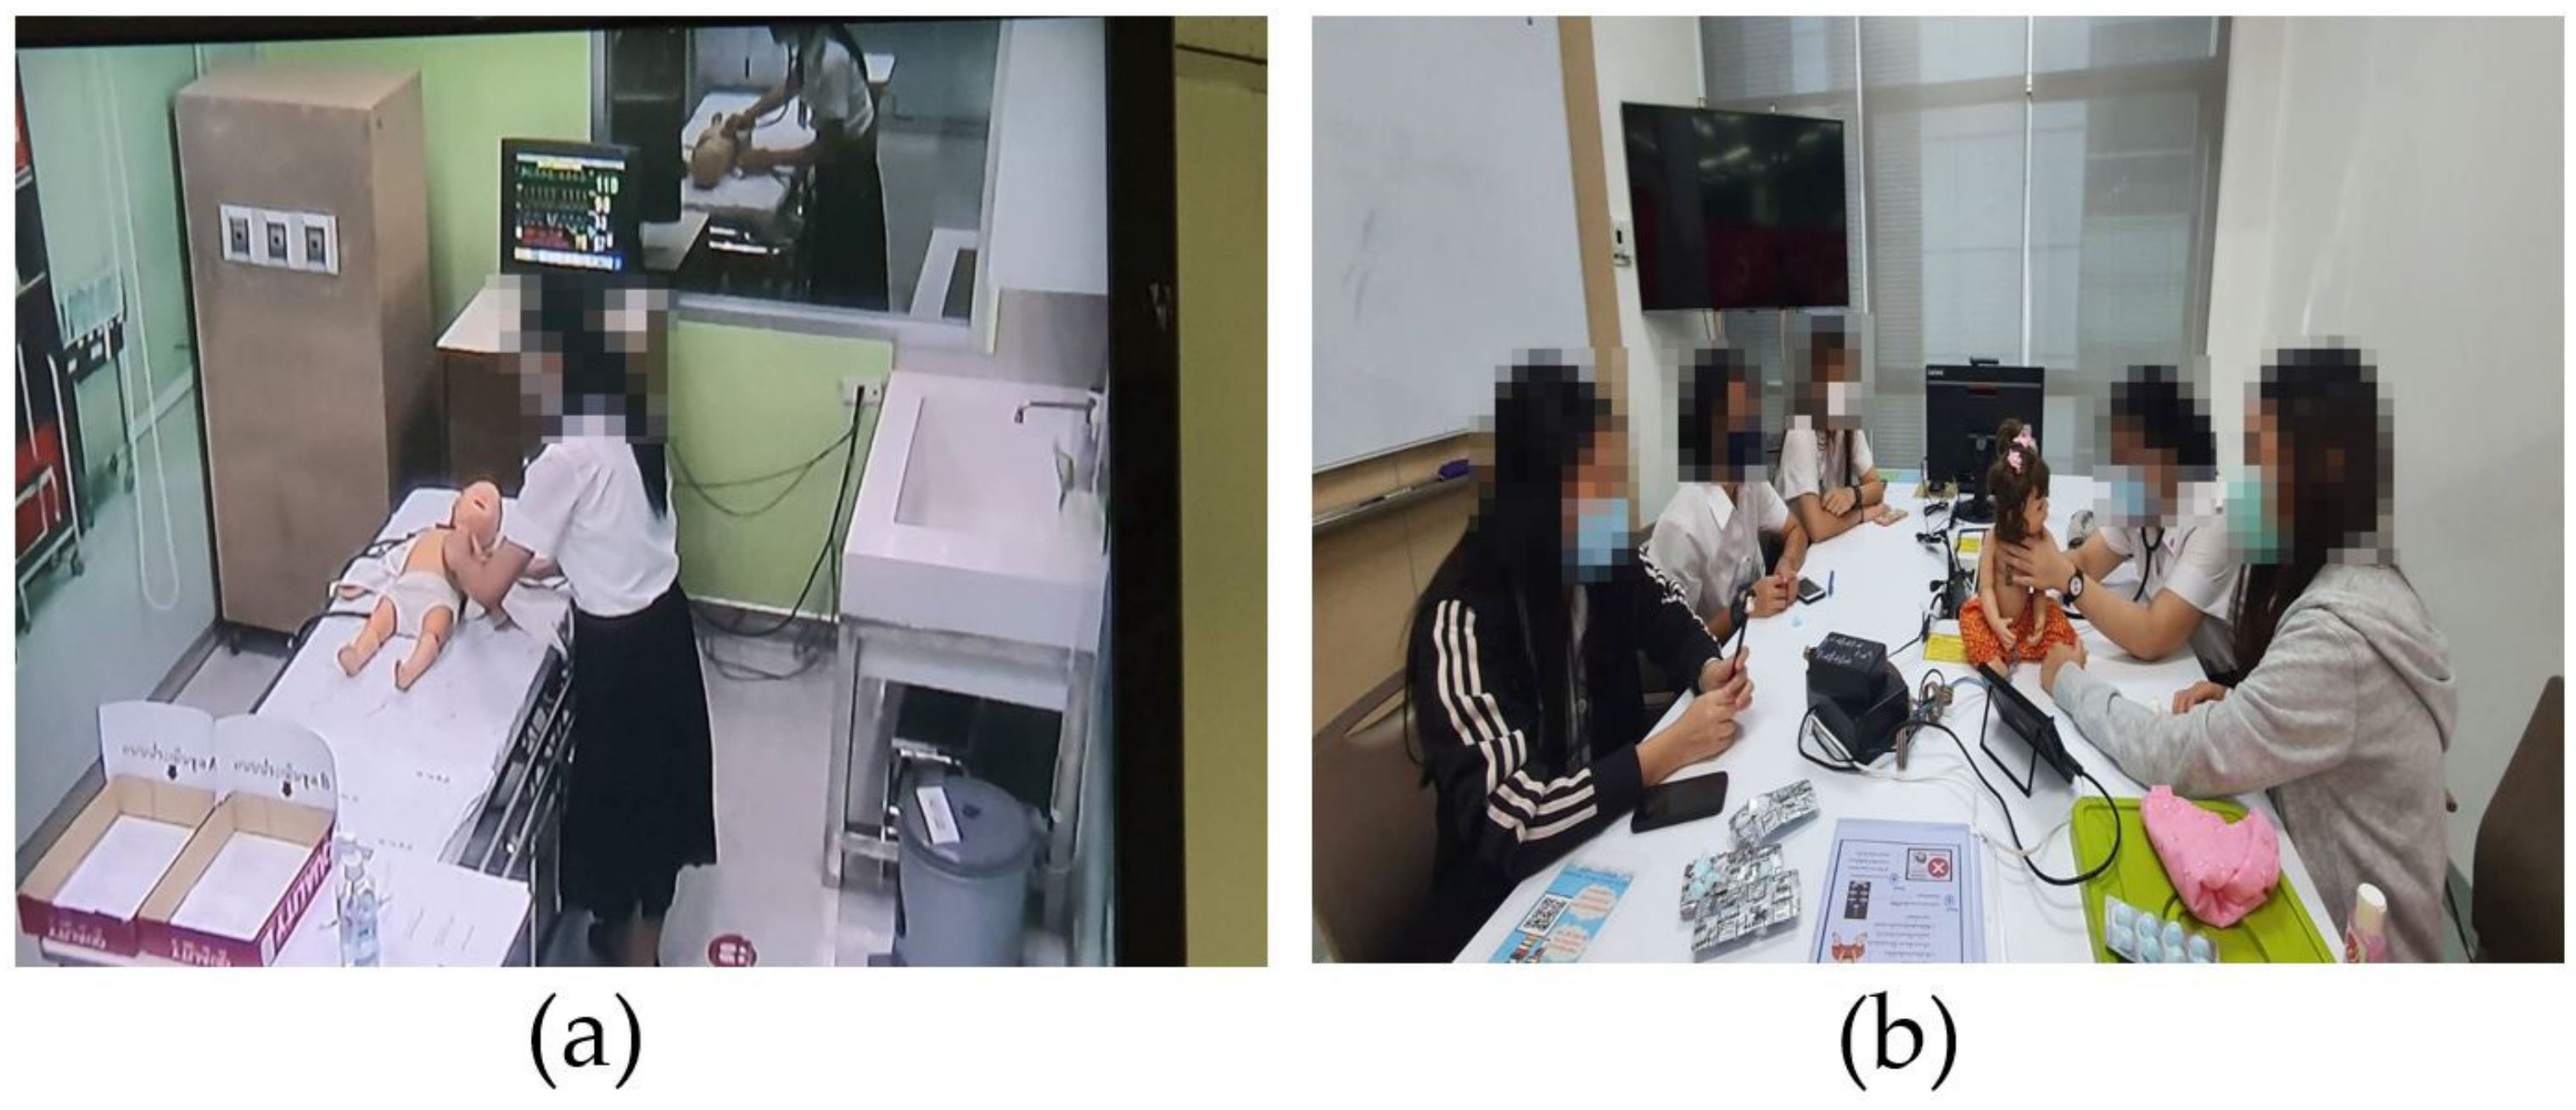
The response box is for nursing students to enter their answers after using the stethoscope to listen to the breathing sounds on the CHIM in all positions. As seen in
Figure 7, it has seven buttons and one LED light. Six buttons with the names of breathing sounds below are sound selection buttons to answer, feedback knowledge, and understanding from nursing students after auscultation. One button locates the top for a reset process. After nursing students choose their answers, the embedded programs in the control box will check the correctness and display the results on the display screen and LED light on the response box immediately. A green LED light for a correct answer and a red color for an incorrect answer. The control box functionality achieves the 7th step of Gagné’s learning theory (providing feedback).
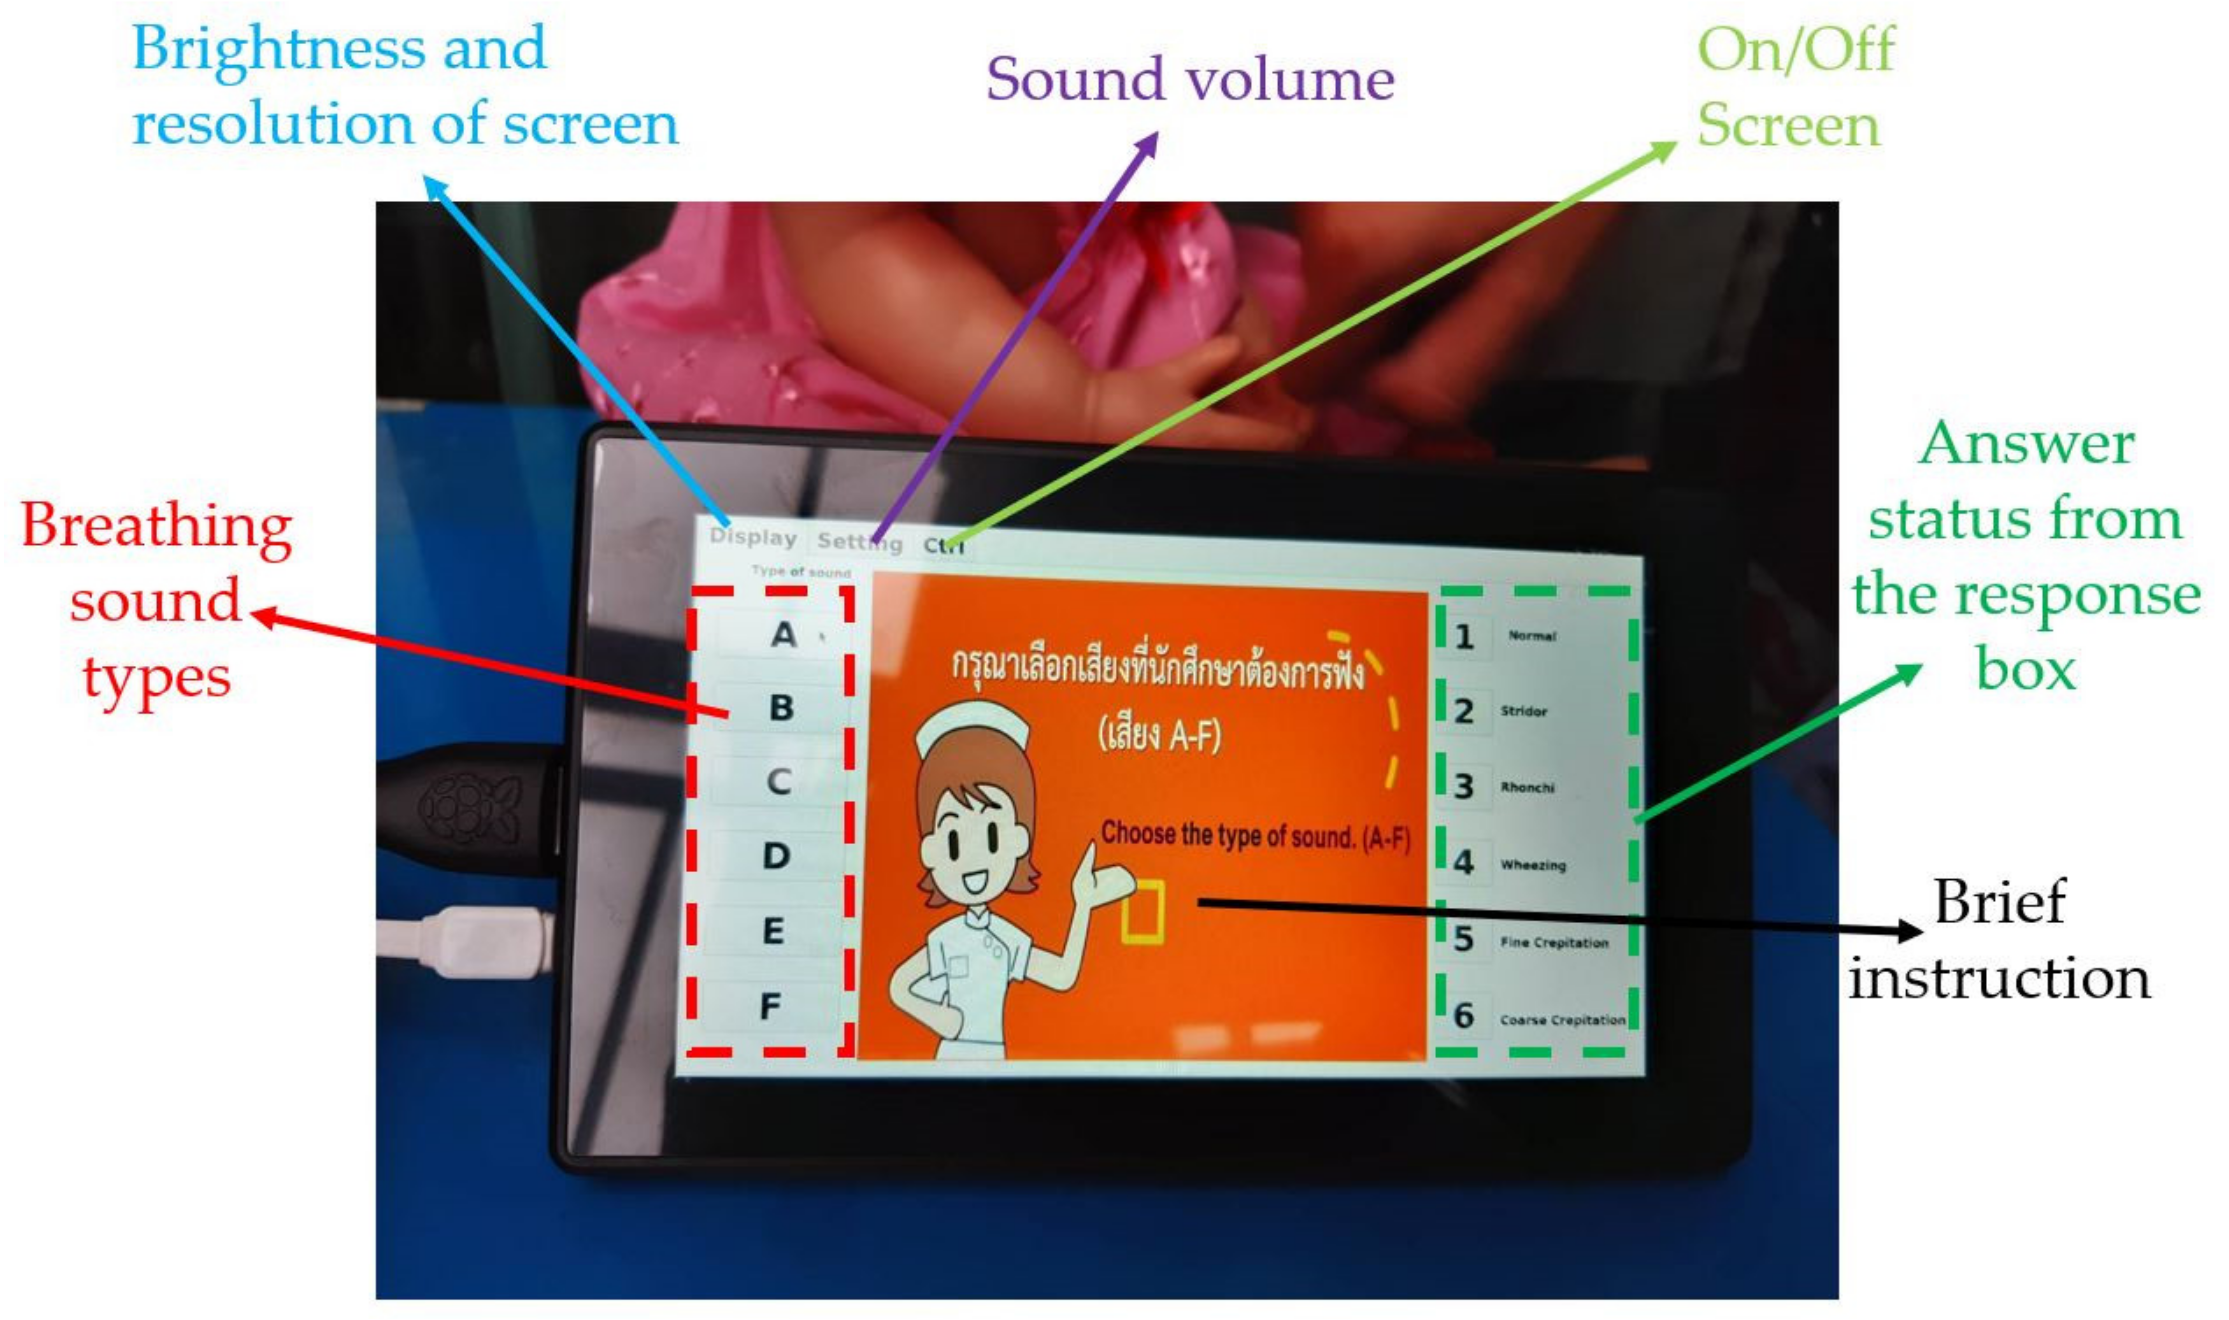
Every button press changes the display screen, which may make users confused. Therefore, QtCreator was employed to design the display screen to help the users’ ease of use.
Figure 8 presents the display screen details. It includes many small boxes representing breathing sound type, answer status, display, setting, and control. For example, first, the breathing sound type boxes on the left allow nursing students to select the breathing sound types. Second, the answer status boxes on the right are the results of a user-selected button at the response box. Third, a display box on the top is for brightness and screen resolution settings. Fourth, the setting box is for a sound volume adjustment. Fifth, the control box is for turning on or off the CHIM. Finally, a brief instruction to guide users is in the middle of the screen, which depends on the user selection.
To use the CHIM, first, select the breathing sound on the left of a display screen. Then, place the stethoscope at various positions on the CHIM’s body and listen carefully. Next, choose the correct answer you think from the response box. After that, observe the color of the LED light on the box and the information on the display screen. It is green for correct and red for incorrect. If it is red, choose a new answer repeatedly until it is correct. Finally, you can select other breathing sound types to train yourself if it is correct or press the reset button. To understand the display screen, the small yellow boxes in
Figure 6, and the response box operating, please download Display_Screen.pdf and Example.mp4 showing a usage example of both devices in
Supplementary Materials.
2.2.2. Software
In summary, there were three software employed in this research. First, the C programming language was used to write the algorithm for devices in the control box. Second, QtCreator was applied to create the display screen layout. The last, the Raspberry pi operating system, was used to connect precisely and control all devices working together.
All devices, including hardware and software, were assembled completely to be the CHIM. Then, the actual usage was tested until the authors were confident that it worked correctly and safely. The next step is to assess the reliability in terms of breathing sound types, positions, usage, and satisfaction by experts.


